PRIMARY CATEGORY → SETUP
kitty → Fast and Feature-Rich GPU Based Terminal Emulator
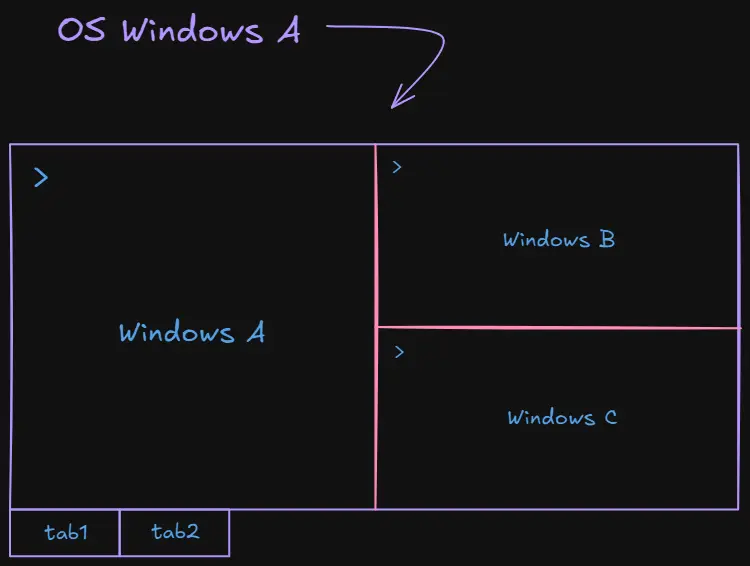
It is an enhanced terminal with a tabbed/tiling structure focused in performance and customization
Each tab can be divided into several panes/windows
Some of this features are →
- Multiple Instances and Windows
- Setting of Keybinds/Hotkeys via a simple configuration file
- Image and Emojis Display
$ kitty +kitten icat /path/to/image
IMPORTANT
Note that some dependencies are required to display images in this Kitty Terminal Emulator through the command above such as imagemagick
Just check that the package is installed →
$ bash -c "apt list --installed *imagemagick*"If not →
$ apt install -y -- imagemagickAnyways, It should be installed, as It is indicated as environment dependency to be installed in the Setup’s components section
- SSH Protocol support
$ kitty +kitten ssh user@hostnameNote that the above commands use the syntax kitty +kitten
kittens are small integrated programs that extend kitty’s capacity - See here
kitty is launched by the sxhkd daemon when a certain input event, such as a Hotkey, is performed
# ~/.config/sxhkd/sxhkdrc - Kitty Launch Hotkey
super + Return
  /opt/kitty/bin/kitty
Configuration File → ~/.config/kitty/kitty.conf
More information here
💫 Awesome Documentation → Kitty Site
Installation
CAUTION
First, see the bspwm’s installation before proceeding with this one related to
sxhkdThere are some dependencies that are needed in the following installation steps
Download the binary and its related files from the project’s release page. The required one, in this Environment Setup is the Linux amd64 binary bundle
Being root →
$ mkdir /opt/kitty
$ mv /home/al3xbb/Downloads/kitty-0.36.2-x86_64.txz !$
$ cd !$ && tar --extract --verbose --file kitty-0.36.2-x86_64.txz
$ rm -i -- !$INFO
That .TXZ file is simply a TAR package compressed via XZ. As the above command does, It can be decompressed and unpacked using the
tarcommandIt can also be done in two steps through →
$ 7z x file.txz && tar --extract --verbose --file file.tar$ xz --decompress --verbose --threads=0 file.txz $ (( $? )) || tar --extract --verbose --file file.tar
That’s it
$ command -V kitty
kitty is /opt/kitty/bin/kitty
As for the kitty’s Configuration File, It need to be created
Just create it in ~/.config/kitty and paste this Configuration File’s content into it →
$ nvim ~/.config/kitty/kitty.conf # Or {nano,vi,emacs,vim...}Moreover, as mentioned below, a color.ini file must also be created in the ~/.config/kitty directory to apply various terminal colours
Copy the Color.ini file from here and paste into it →
$ nvim ~/.config/kitty/color.iniOnce the above is done, as Root, copy the entire /home/al3xbb/.config/kitty directory’s content into his kitty’s configuration directory
$ cp /home/al3xbb/.config/kitty/* ~/.config/kitty/Hack Nerd Fonts
See here to download them
To install them, as root →
$ mv /home/al3xbb/Downloads/Hack.zip /usr/local/share/fonts
$ cd !$
$ 7z x Hack.zip # Or unzip
$ rm -i -- {LICENSE,README}.md !$Once installed, just check in the kitty.conf file that the font_family parameter is set as follows →
font_family HackNerdFontMore info here
Configuration File
Kitty.conf Configuration File Sample Fully documented
kitty.conf → Copy from here the kitty’s Full Customised Configuration File
color.ini → Likewise, copy from here the kitty’s Colours File
Configuration File Documentation → kitty.conf
Parameters
Font
Several parameters related to the kitty terminal’s font such as the font_family or font_size can be specificed in the kitty.conf configuration file
Take a look at this installation for more information
Shell
This Enviroment Setup make use of a ZSH as the Default Shell
IMPORTANT
The following action requires the ZSH shell to be installed on the system
Just installed it via the apt repositories as follows →
$ apt install -y -- zshAnyway, See this to get it all set up as far as ZSH is concerned
Then, It’s necessary to tell it to Kitty. This can be done via the shell parameter
shell zshBackground Opacity
The kitty terminal’s opacity is set by the background_opacity parameter
Its value ranges from 0, fully transparent, to 1, opaque
background_opacity 0.55IMPORTANT
Note that the Terminal’s Background Opacity will probably not work until the picom component is correctly configured
Colours
Regarding the kitty terminal’s colours, a .ini file is included in the kitty.conf
include color.iniGet the color.ini file content here
Actions and Default Shortcuts
All mappable actions here
All default shortcuts here related to Windows, Tabs, Layouts…
Custom Shortcuts ~ TL;DR
Layouts
| Action | Shortcut |
|---|---|
| Toogle between Split and Stack Layout | C-S-z |
| Split Rotation | C-S-o |
Windows
| Action | Shortcut |
|---|---|
| Vertical Split | C-S-Enter |
| Horizontal Split | C-S-dash/hyphen |
| Adaptative Split | C-S-plus |
| Windows Closing | C-S-w |
| Windows Movement ⬆️⬅️➡️⬇️ | C-M-{k,h,l,j} |
| Windows Focus ⬆️⬅️➡️⬇️ | C-S-{k,h,l,j} |
| Windows Resize ⬆️⬅️➡️⬇️ | M-S-{k,h,l,j} |
| Windows Resize - Reset | M-S-r |
| Windows Detach | M-S-w |
Tabs
| Action | Shortcut |
|---|---|
| Tab Creation | C-S-t |
| Tab Closing | C-S-q |
| Tab Detach | C-M-o |
| Tab Rename | C-M-S-t |
| Tab Movement (Backward ~ Forward) ⬅️➡️ | C-{S-TAB,TAB} |
| Tab Focus (Previous - Next) ⬅️➡️ | C-S{commma,dot} |
Misc
| Action | Shortcut |
|---|---|
| Paginate last Command Output | C-S-g |
| Clear Screen and Scrollback Buffer | C-l |
| Copy to Clipboard | C-S-c |
| Paste from Clipboard | C-S-v |
| Copy to Buffer A | f1 |
| Paste from Buffer A | f2 |
| Copy to Buffer B | f3 |
| Paste from Buffer B | f4 |
| Increase/Decrease Font Size | C-S-{plus,minus} (Block-Num) |
| Restore Font Size | C-S-Backspace |
Custom Shortcuts
Note that, as mentioned earlier, a keybind is mapped to a specific action
Keybind → Action
map KEYBIND ACTION # An Action may has argumentsINFO
All the following block codes are snippets extracted from the Kitty’s Configuration File
Layouts Management
All the Layouts are enabled by default. To switch between them use default shorcut → C-S-l
In the configuration file, the selected ones are the Splits Layout and the Stack Layout
Most of the mappeable actions used there have been implemented in the kitty.conf file, such as the below ones
enabled_layouts splits,stackAs mentioned in the reference link above, the Splits Layout is the most flexible layout
The Stack Layout is simple enabled to allow zooming in and out a specific Window, i.e. switching between the two layouts via the toogle_layout mappeable action below
Switch to Stack Layout (Window Zoom {in,out}) → C-S-z
Switch to Stack Layout
map ctrl+shift+z toggle_layout stackIMPORTANT
The
toogle_layoutaction switches to the layout specified as argumentA handy action is implemented in the code above, which allows Zoom due to the change to the Stack Layout
If the action is performed again being in the specificed layout, It switches to the latest layout
Basically it removes the zoom generated by the Stack Layout
Split Rotation → C-S-o
Shown in the Split Layout Section
map ctrl+shift+o layout_action rotateBasically rotates the current Windows Split (i.e. Horizonal ↔ Vertical)

Window Management
Most of the mappeable actions below are implemented in the Split Layout Section
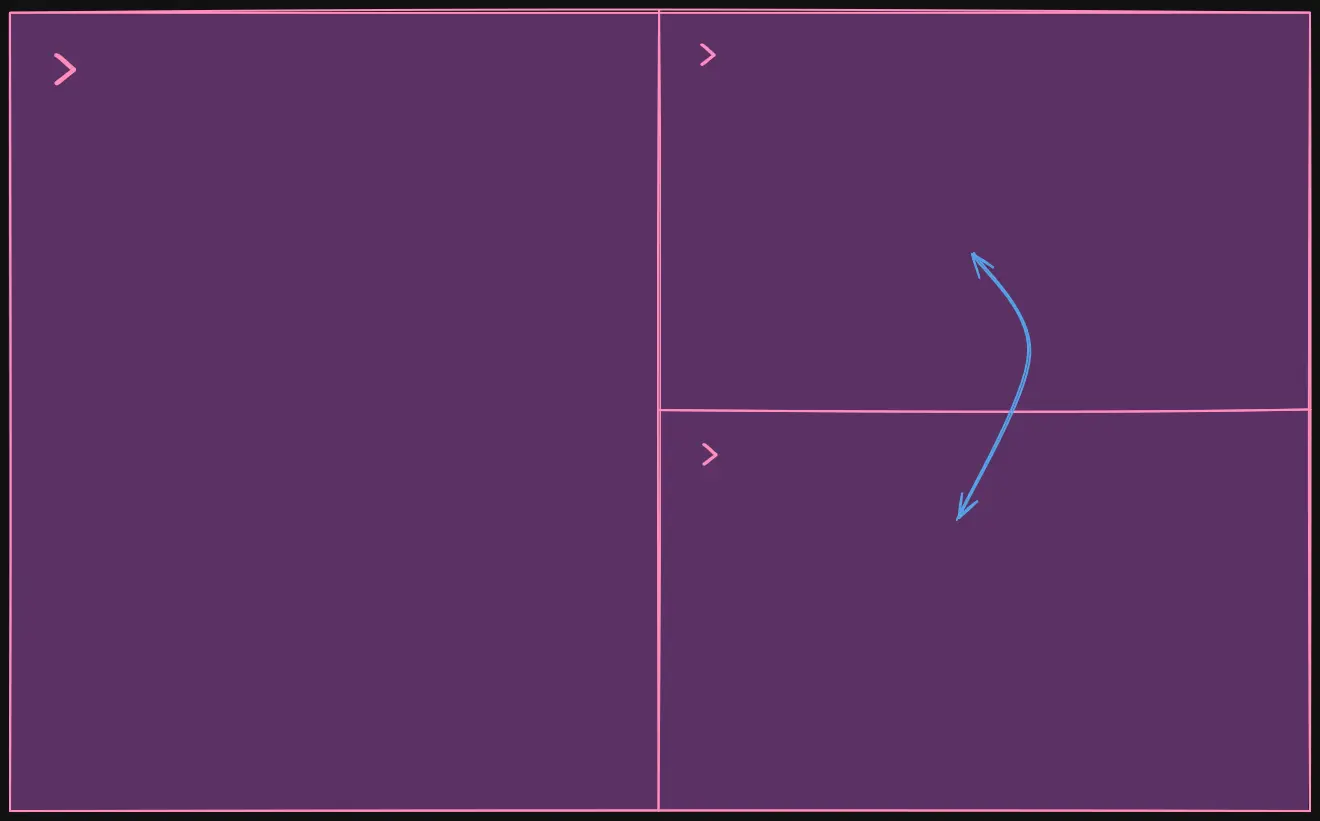
Window Split
Different types of Split are implemented through the launch action
- Vertical Split →
C-S-enter
map ctrl+shift+enter launch --location=vsplit --cwd=current- Horizontal Split →
C-S-dash/hyphen
map ctrl+shift+- launch --location=hsplit --cwd=current- Adaptative Split →
C-S-plus
map ctrl+shift++ launch --location=split --cwd=currentThe --cwd=current option of the launch action causes the terminal of the newly generated window to retain the previous CWD
CWD → Current Work Directory
IMPORTANT
Take into account that the split orientation is being handled by the
--locationoptionSee here
Windows Movement → C-M-{k,h,l,j}
Moves the Windows in the specificed direction. It is like a Windows Exchange
Action → move_window
map ctrl+alt+k move_window up
map ctrl+alt+h move_window left
map ctrl+alt+l move_window right
map ctrl+alt+j move_window down
INFO
Note that Vim-like Motions are being used here to increase efficiency
Windows Focus → C-S-{k,h,l,j}
Move the Focus in the specified selection between the adjacent Windows in the current Tab
Action → neighboring_window
map ctrl+shift+h neighboring_window left
map ctrl+shift+l neighboring_window right
map ctrl+shift+k neighboring_window up
map ctrl+shift+j neighboring_window down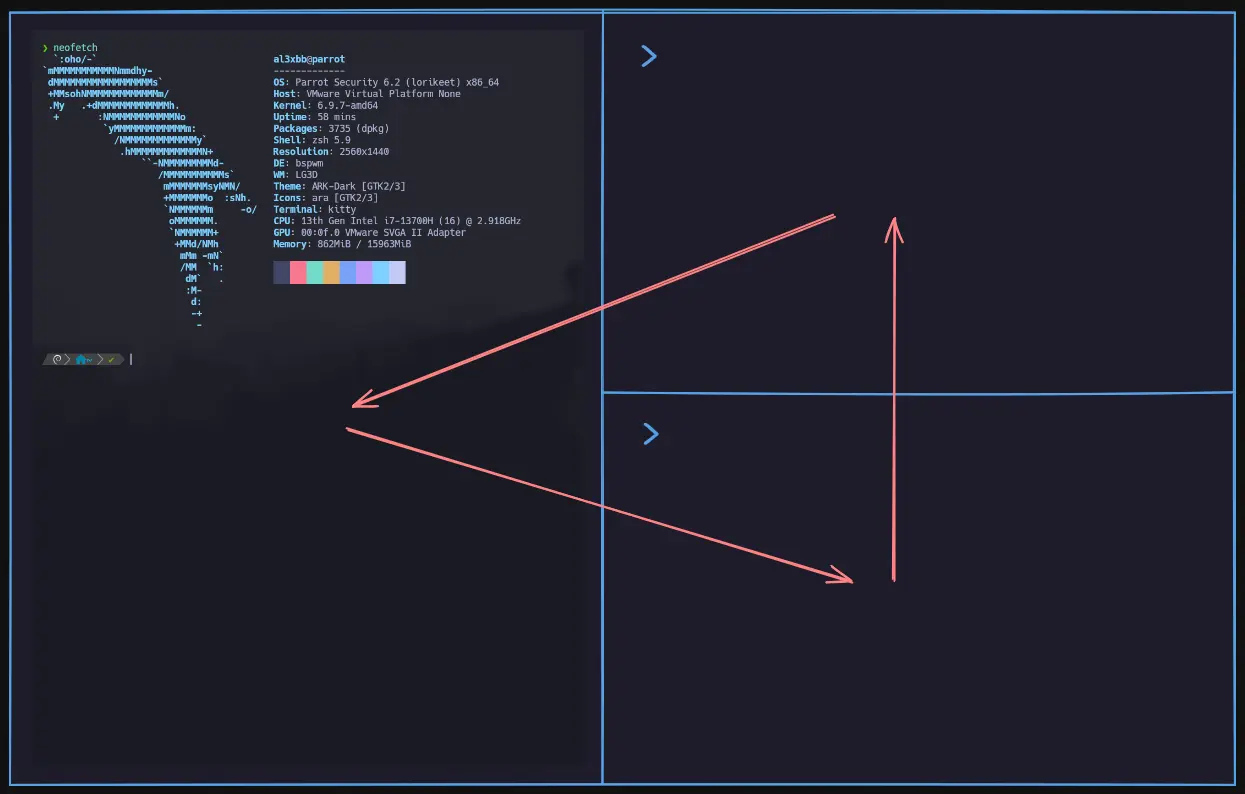
Windows Resize → M-S-{k,h,l,j,r}
Default Shorcut to enter the Windows Resize Mode → C-S-r
Thus, the Window is resized using:
w→ Widern→ Narrowert→ Tallers→ Shorterr→ Reset Windows Size
To resize a Windows in a customised way, use the resize_window action
As mentioned earlier, Nvim-like Motions are used to increase efficiency. Therefore, instead of use the above ones, use these →
map alt+shift+h resize_window wider 3
map alt+shift+l resize_window narrower 3
map alt+shift+k resize_window taller 3
map alt+shift+j resize_window shorter 3
IMPORTANT
The above
resize_windowmappeable action receives two argumentsThe First one is simply the windows resize motion to be made (i.e. Narrower, Taller, Shorter, Wider)
While the second one controls the resizing increment
To reset all Windows to their initial size, use the reset option in the resize_window actions rather than a specific motion
map alt+shift+r resize_window resetWindows Detach → M-S-w
Completely detach a Window in a new Window OS
Actions → detach_window
map alt+shift+w detach_window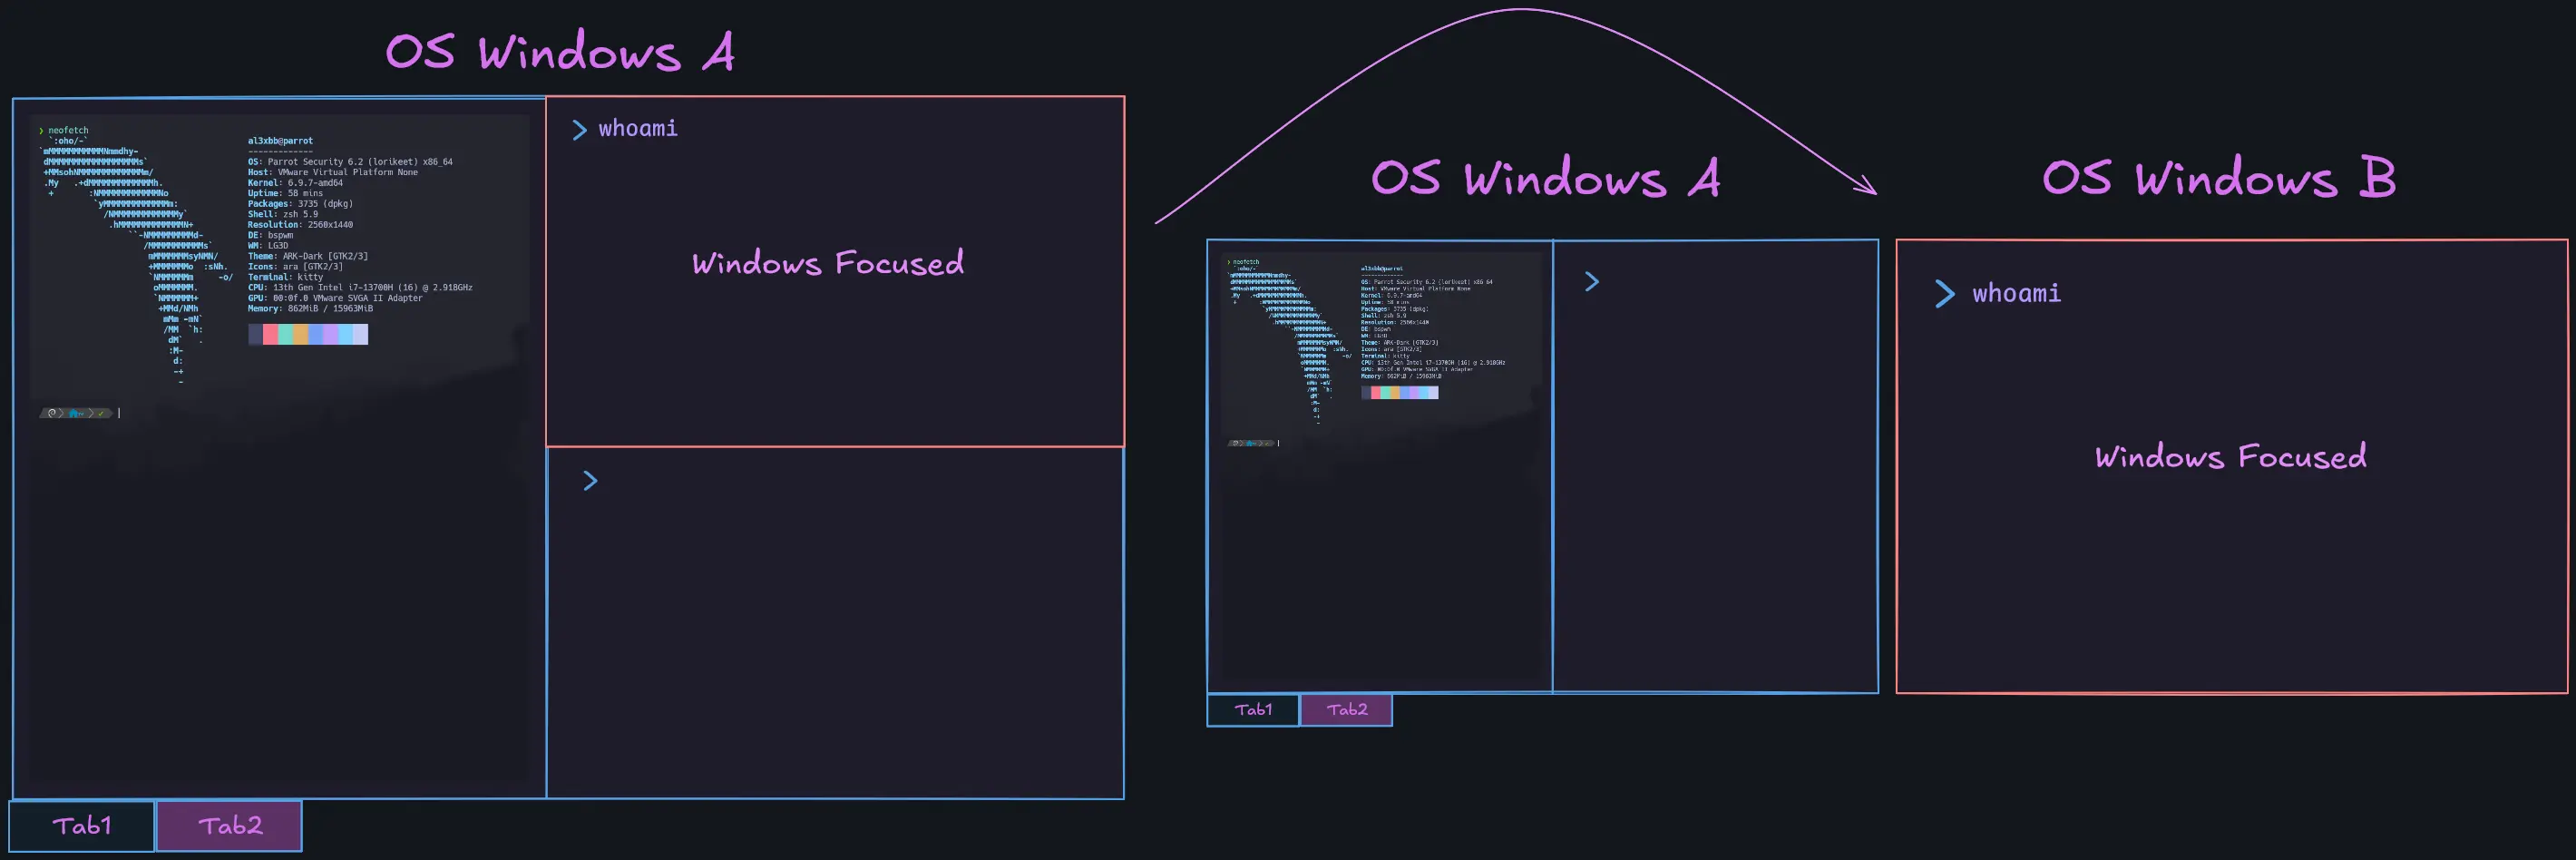
Tab Management
Tab Creation → C-S-t
Default shortcut to open a new tab → C-S-t
The above one keybind is overwritten in the Configuration File by the new_tab_witch_cmd mappeable action
This allows to create a new tab while keeping the CWD
map ctrl+shift+t new_tab_with_cwdTab Detach → C-M-o
Completely detach a tab in a new Window OS
Action → detach_tab
map ctrl+alt+o detach_tab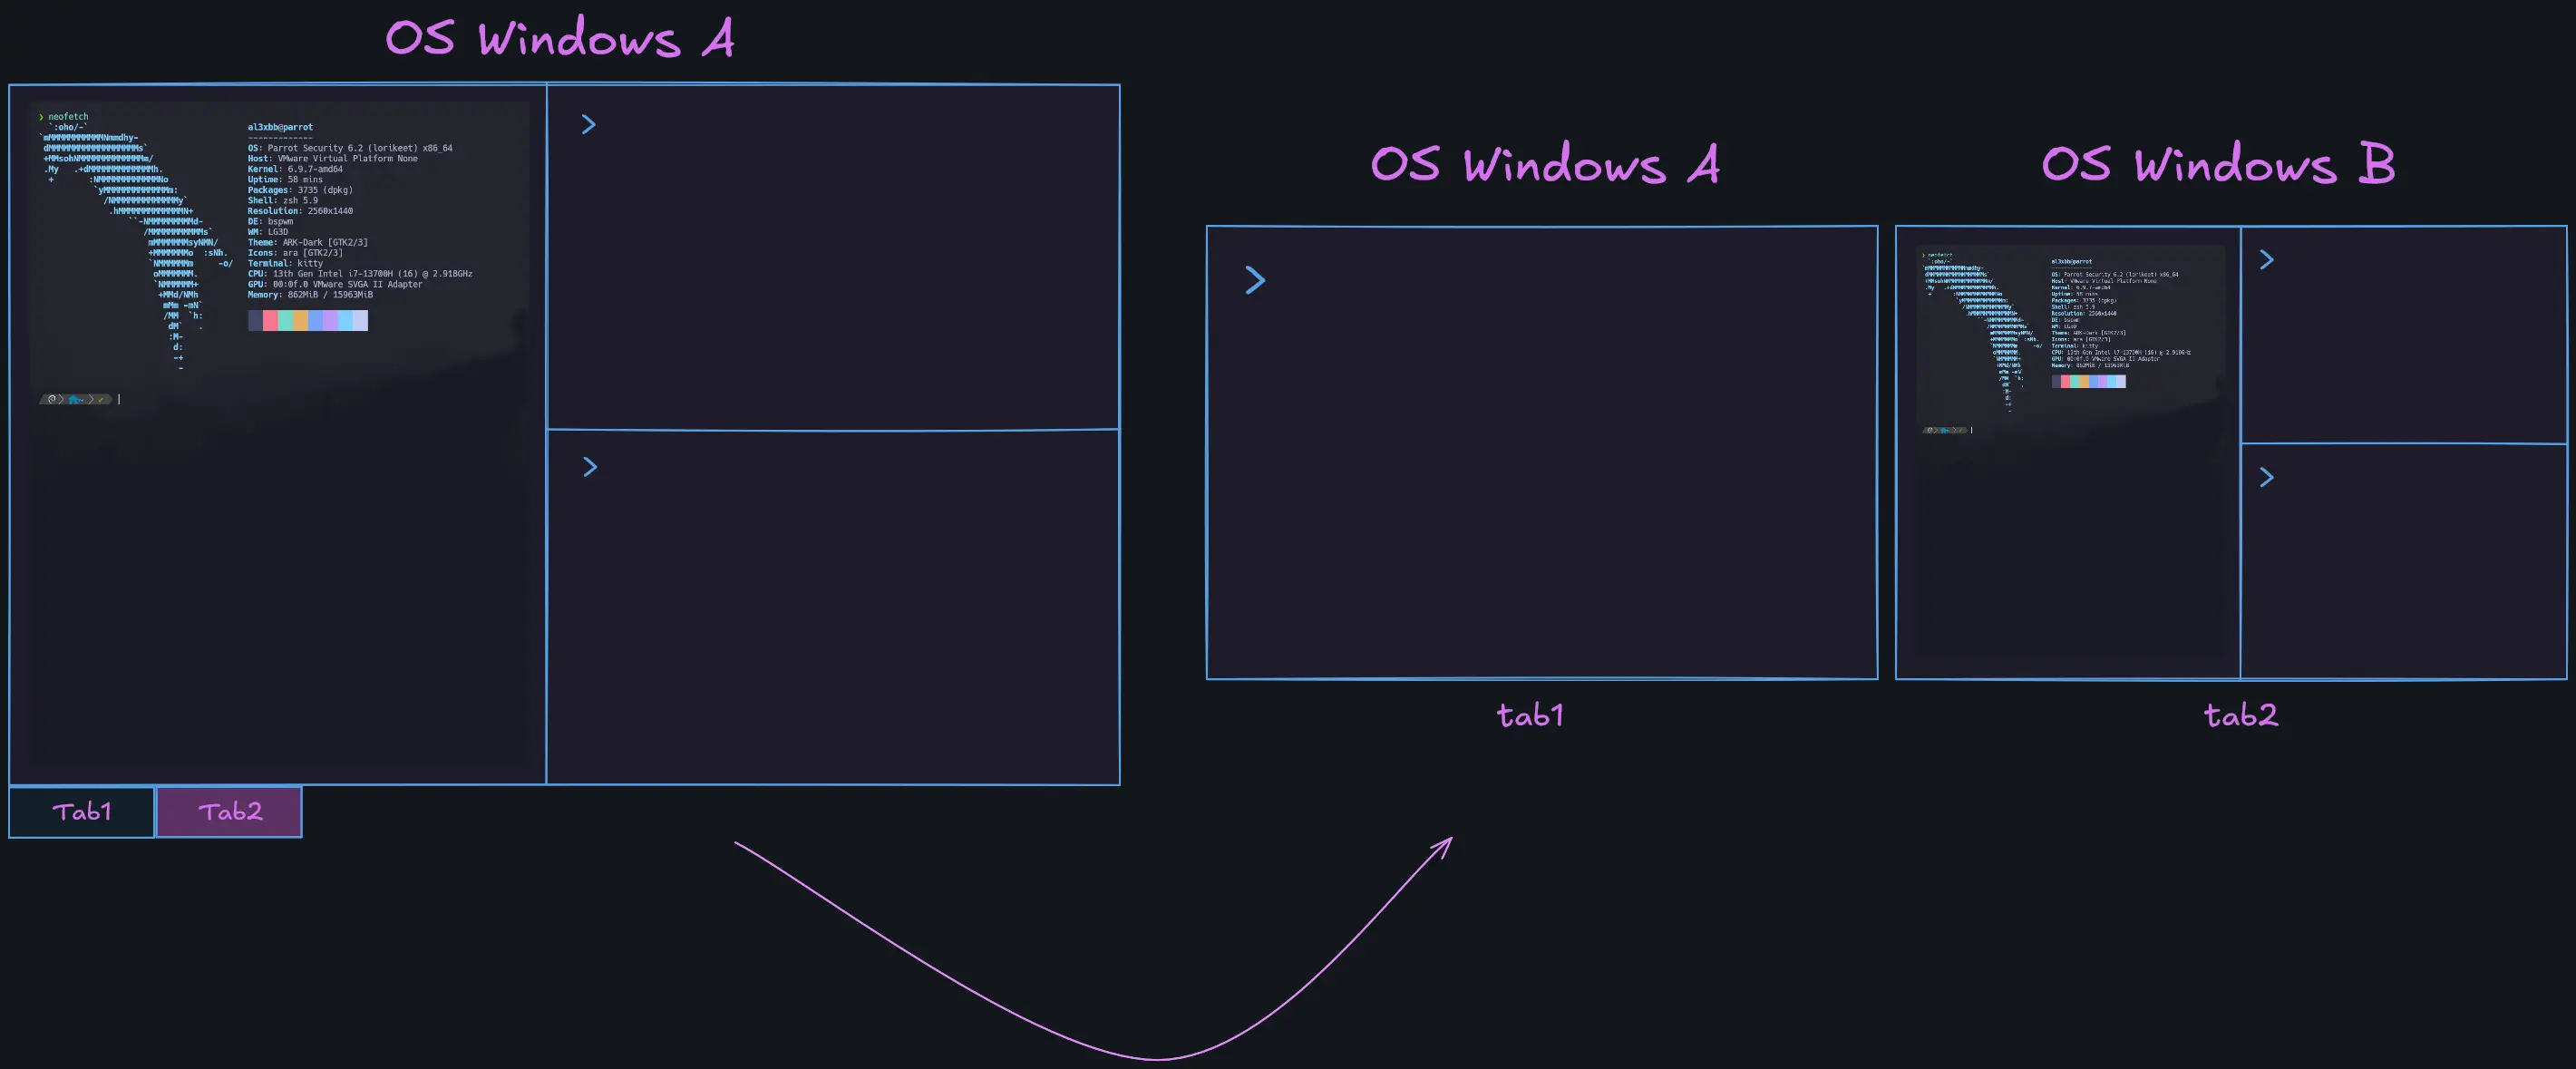
Copy ~ Paste
Traditional Clipboards → C-S-{c,v}
This environment setup make use of several Copy/Paste mappeable actions such as:
copy_to_clipboard→C-S-cpaste_from_clipboard→C-S-v
The above ones are mapped with the default shortcuts
Additional Clipboards (Buffers) → {f1,f2,f3,f4}
The customised ones are the related to the Buffers
A Buffer simply is a string that stores the value copied into it. Then, that value can be pasted from the Buffer to any location
In this case, two Buffers are declared in kitty.conf and used →
map f1 copy_to_buffer a # Buffer a
map f2 paste_from_buffer a
map f3 copy_to_buffer b # Buffer b
map f4 paste_from_buffer b
Miscellaneous
Clear Screen and Scrollback Buffer
map ctrl+l clear_terminal to_cursor activeIMPORTANT
The same or similar actions can also be performed via functions declaration in a shell rc file such as the zshrc
- Clear Screen →
clearOnlyScreen() {
    printf "\e[H\e[2J"
	zle && zle .reset-prompt && zle -R
}
- Clear Screen and Scrollback Buffer →
clearScreenAndScrollback() {
    printf "\e[H\e[3J"
    zle && zle .reset-prompt && zle -R
}
- Clear Screen saving its content in Scrollback Buffer →
clearScreenSavingContentsInScrollback() {
    printf "\e[H\e[22J"
    zle && zle .reset-prompt && zle -R
}
Note that the ZSH Line Editor
zleis used in the above functions to prevent some undesired actions and perform a more optimal cleanup
zle→ Verify if the ZSH Line Editor is available
zle .reset-prompt→ Prompt Restart to prevent corruption due to clear or reset actions
zle -R→ Prompt Redisplay to prevent visual problemsSee this pull request discussion
In this environment setup, this action is implemented in the zshrc as follows →
clearScreenAndScrollback () {
	clear && printf '\e[3J' # Or printf "\e[H\e[3J"
	zle && zle .reset-prompt && zle -R # Avoid Screen Element/Prompt Corruption
}
zle -N clearScreenAndScrollback
bindkey '^L' clearScreenAndScrollbackINFO
The last commands above perform the following actions:
zle -N FUNCTION_NAME→ Function register as a New Widget in ZSH Line Editor
bindkey KEYBIND FUNCTION_NAME→ A certain keybind runs the passed function